In this blog post, we will show you how to use EasyApache through the Linux command line. This method is quicker than using the standard EasyApache interface in WHM and uses less memory.
Using EasyApache through the command line is pretty easy and actually, it is the preferred way. First of all, you need to access your server via SSH as user root.
ssh root@IP
Once logged in, start a screen session, so if your connections drops, the EasyApache process will keep running on the server.
screen -U -S easyapache
To start the EasyApache tool from the command line, run the following command
/scripts/easyapache
The script will check your system configuration and it will ask you to update cPanel if there is an update available
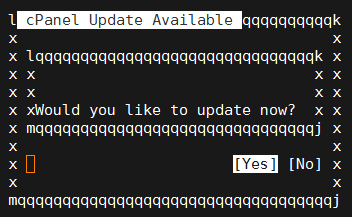
It is recommended to always use the latest version of WHM/cPanel, so select [YES] and press the Enter key to update cPanel.
If there is no update available, EasyApache will bring up an interactive menu when you can select the profile that you want to customize.
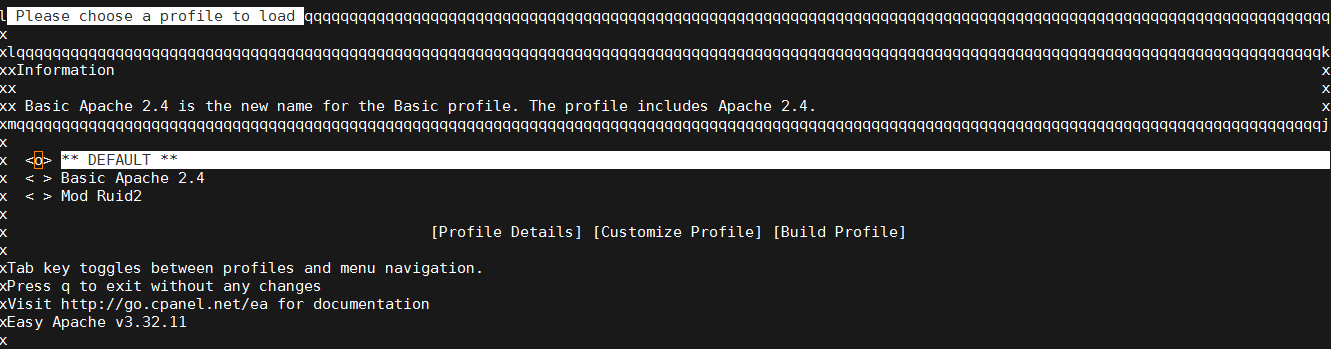
Select the ‘DEFAULT‘ profile, press the Tab key to select the ‘Customize Profile‘ option and hit Enter to go to the next screen.
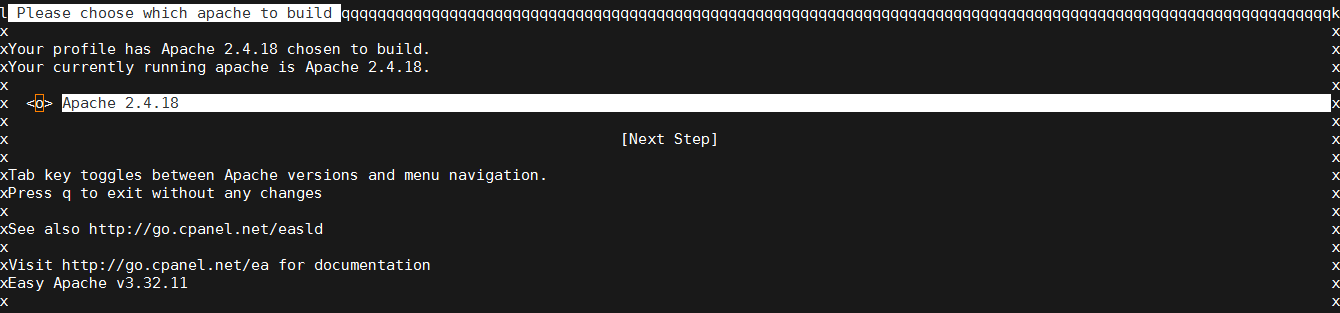
On the next step, select the Apache version that you want to build and go to the next step. In our case only Apache version 2.4.18 is available.
The next screen asks you to select the PHP version that you want to use on your server. If you are changing the PHP version, you should make sure that all your PHP applications and scripts are compatible with the new version of PHP. Since we selected a new version of PHP to be installed on the server, a pop-up window informed us what changes will be made and which modules will be removed from the new configuration.

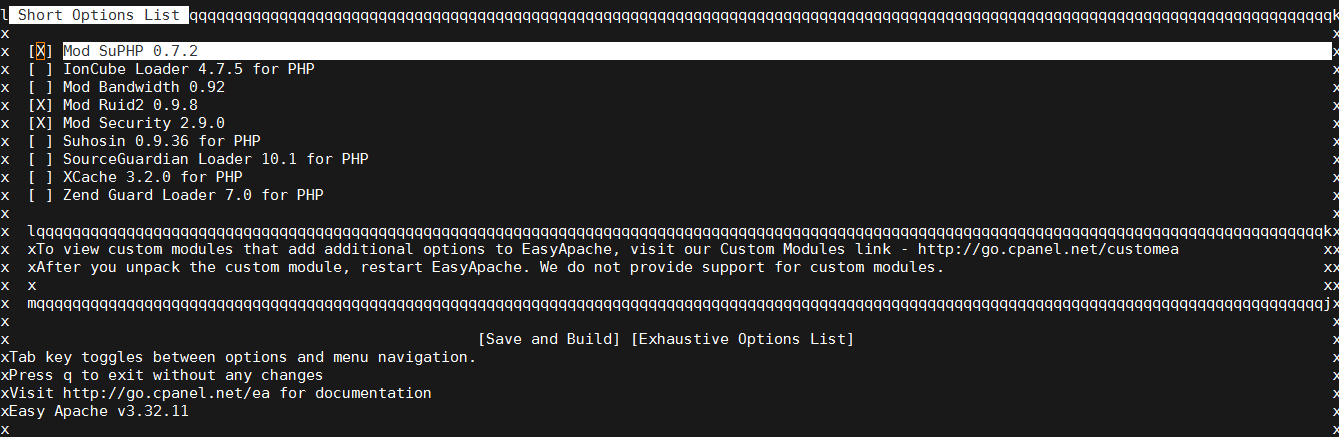
On the next step, you can select the modules that you want to enable from the shortlist of the most commonly used Apache and PHP modules, or you can get an exhaustive list of options when you can see all available modules. Select all modules that you want to enable in the new configuration and hit the Tab and Enter keys to go to the next step.
Now, you can choose what to do with the new configuration. Save the new configuration or save the configuration and build it. Select the second option to build the new configuration.
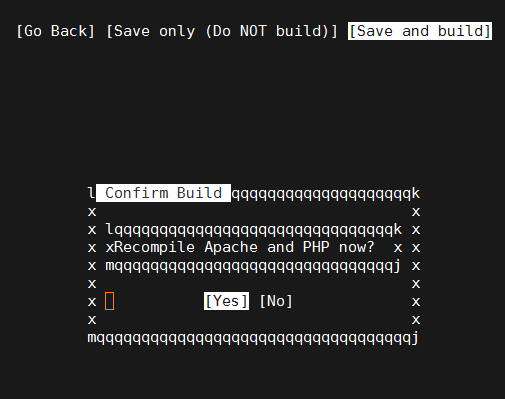
This will initiate compiling and configuration of Apache, PHP and all modules that you selected from the list. This process may take some time, so please wait until the compiling is completed and you get the “Build Complete!” message.
Of course you don’t have to do any of this if you use one of our Linux Cloud Hosting services, in which case you can simply ask our expert Linux admins to change the PHP or Apache version or to enable some Apache and PHP modules on your server. They are available 24×7 and will take care of your request immediately.
PS. If you liked this post please share it with your friends on the social networks using the buttons on the left or simply leave a reply below. Thanks.