
In this tutorial, we will show you how to install Nagios on Debian 9. Nagios is an open-source monitoring tool for servers, network devices, and applications. It helps you monitor the services, resources, and applications that run on your server. It can also be used to monitor Linux and Windows servers as well as web applications, Linux/Unix applications, and Windows applications. Some of the features include parallelized service checks, a plugin system, notifications via email, pager or user-defined service, a web interface for viewing status, log files, problem history with a notification system, and much more.
1. Update your server and install the necessary packages
Log in to your VPS via SSH as a sudo user:
ssh userame@IP_Address
Once you are logged in, update your system repositories and software packages by issuing the following command:
apt update
apt upgrade
The next step is to install the pre-requisite packages necessary for building Nagios by executing the following command:
apt install -y build-essential autoconf gcc libc6 make wget unzip libgd2-xpm-dev
2. Download and Install Nagios
Download the latest stable version of the Nagios tar archive in the /opt directory on your server:
wget https://github.com/NagiosEnterprises/nagioscore/archive/nagios-4.4.2.tar.gz -O /opt/nagioscore.tar.gz
When the download is completed, change to the temporary directory and extract the archive with the following commands:
cd /opt
sudo tar xf nagioscore.tar.gz
Once the Nagios archive is extracted, change to the nagioscore-nagios-4.4.2 directory:
cd /opt/nagioscore-nagios-4.4.2
The next step is to run the ./configure script, which will check your system for any missing libraries or binaries and prepare the Nagios source code for the build process:
./configure
Now that the configuration is completed, start the compilation process by using the make all command:
make all
Run the following command to create the Nagios user and group and add “www-data” to the Nagios group:
sudo make install-groups-users
sudo usermod -a -G nagios www-data
The next step is to install Nagios using the make install command:
sudo make install
Run the following command to install the Nagios sample configuration files:
sudo make install-config
We will install the service or daemon files and also configure them to start on boot:
make install-init
Now install and configure the external command file:
make install-commandmode
Next, install the Apache web server configuration files with:
sudo make install-webconf
Restart apache service:
sudo systemctl restart apache2
a2enmod rewrite && a2enmod cgi
3. Configure the Nagios web interface
In order to be able to log in to Nagios, you will have to create an Apache user account. To create a new user account called nagiosadmin and assign a password to it, run the following command:
htpasswd -c /usr/local/nagios/etc/htpasswd.users nagiosadmin
4. Download and install Nagios plugins version 2.2.1
To work properly, Nagios Core needs plugins to monitor various services. You need to make sure that you have the pre-requisites packages installed:
apt install -y autoconf gcc libc6 libmcrypt-dev make libssl-dev wget bc gawk dc build-essential snmp libnet-snmp-perl gettext
Now we will create our working directory in the /opt directory, where we will download the plugins:
mkdir /opt/nagios && cd /opt/nagios
wget --no-check-certificate -O nagios-plugins.tar.gz https://github.com/nagios-plugins/nagios-plugins/archive/release-2.2.1.tar.gz
tar zxf nagios-plugins.tar.gz
cd nagios-plugins-release-2.2.1
Now we will compile and install the plugins:
./tools/setup
./configure
make
make install
Before starting Nagios, we need to check if the Nagios configuration file has any errors:
/usr/local/nagios/bin/nagios -v /usr/local/nagios/etc/nagios.cfg
Nagios Core 4.4.2
Copyright (c) 2009-present Nagios Core Development Team and Community Contributors
...............................................
...............................................
Checking global event handlers...
Checking obsessive compulsive processor commands...
Checking misc settings...

Total Warnings: 0
Total Errors: 0

Things look okay - No serious problems were detected during the pre-flight check
In order to access the Nagios web panel, start the Nagios service by issuing the following commands.
systemctl start nagios
Open your browser and navigate to http://your-domain-or-ip/nagios and you will be presented with the login pop-up.
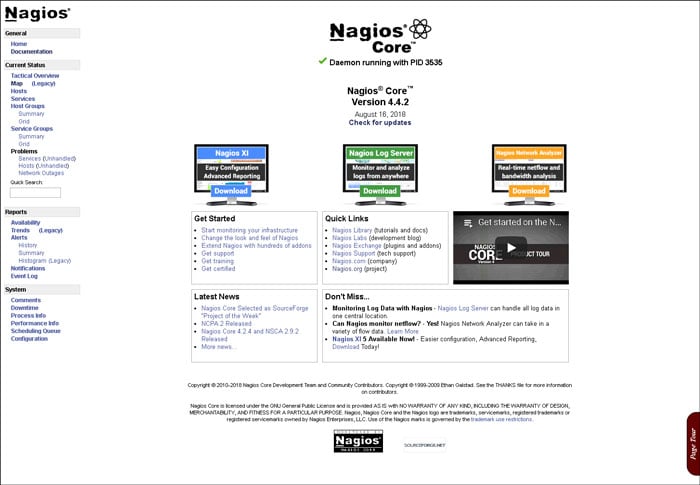
Enter the login credentials that you created earlier with the htpasswd command, and you will be redirected to the Nagios home page as shown in the image below:
That’s it, you have successfully installed Nagios on Debian 9. For more information about how to manage your Nagios installation, please refer to the official Nagios documentation.
![]() Of course, you don’t have to install Nagios on Debian 9 if you use one of our Managed Hosting services, in which case you can simply ask our expert system administrators to install Nagios on Debian 9 for you, using the LAMP stack or any other web hosting stack of your choice. They are available 24×7 and will take care of your request immediately.
Of course, you don’t have to install Nagios on Debian 9 if you use one of our Managed Hosting services, in which case you can simply ask our expert system administrators to install Nagios on Debian 9 for you, using the LAMP stack or any other web hosting stack of your choice. They are available 24×7 and will take care of your request immediately.
PS. If you liked this post on how to install Nagios on Debian 9, please share it with your friends on the social networks using the buttons below or simply leave a comment in the comments section. Thanks.