phpMyAdmin is an open-source, web-based administration tool written in PHP. It is a popular tool used to manage MySQL and MariaDB servers. It is used by system administrators to perform activities like creating and managing databases, users, relations, permissions. It has a simple and user-friendly interface to perform database administration tasks. In this article, we will show you how to install phpMyAdmin on AlmaLinux 10.
Prerequisites
- An AlmaLinux 10 VPS.
- SSH root access, or user with sudo privileges.
Conventions
# – given commands should be executed with root privileges either directly as a root user or by use of sudo command
$ – given commands should be executed as a regular user
Step 1. Install Web Server
In this article, we will show you how to install phpMyAdmin on AlmaLinux 10 with Apache or Nginx. So, in this step you can choose between Apache or Nginx.
Apache
To install Apache, run this command:
# dnf install httpd
Then, execute the command below to run it upon server reboot.
# systemctl enable --now httpd
Nginx
To Install Nginx, execute this command.
# dnf install nginx
After installing nginx, it would not start automatically. Run this command to start it now.
# systemctl enable --now nginx
Step 2. Install MariaDB/MySQL
phpMyAdmin is a web based interface to manage MySQL databases. So, we can only use it on MySQL/MariaDB server, not other database servers like PostgreSQL. Let’s install MariaDB server now.
# dnf install mariadb-server
Upon installation, MariaDB will not start automatically. We need to execute the command below to start it now and enable it to start every time the server reboots.
# systemctl enable --now mariadb
At this point, we can access MySQL shell using root account without password. Let’s run the command below to create MySQL root user a password.
# mysql_secure_installation
You will be prompted for a few questions including the one that ask you to create the password.
NOTE: RUNNING ALL PARTS OF THIS SCRIPT IS RECOMMENDED FOR ALL MariaDB
      SERVERS IN PRODUCTION USE!  PLEASE READ EACH STEP CAREFULLY!

In order to log into MariaDB to secure it, we'll need the current
password for the root user. If you've just installed MariaDB, and
haven't set the root password yet, you should just press enter here.

Enter current password for root (enter for none):
OK, successfully used password, moving on...

Setting the root password or using the unix_socket ensures that nobody
can log into the MariaDB root user without the proper authorisation.

You already have your root account protected, so you can safely answer 'n'.

Switch to unix_socket authentication [Y/n]
Enabled successfully!
Reloading privilege tables..
 ... Success!


You already have your root account protected, so you can safely answer 'n'.

Change the root password? [Y/n]
New password:
Re-enter new password:
Password updated successfully!
Reloading privilege tables..
 ... Success!


By default, a MariaDB installation has an anonymous user, allowing anyone
to log into MariaDB without having to have a user account created for
them.  This is intended only for testing, and to make the installation
go a bit smoother.  You should remove them before moving into a
production environment.

Remove anonymous users? [Y/n] y
 ... Success!

Normally, root should only be allowed to connect from 'localhost'.  This
ensures that someone cannot guess at the root password from the network.

Disallow root login remotely? [Y/n] y
 ... Success!

By default, MariaDB comes with a database named 'test' that anyone can
access.  This is also intended only for testing, and should be removed
before moving into a production environment.

Remove test database and access to it? [Y/n] y
 - Dropping test database...
 ... Success!
 - Removing privileges on test database...
 ... Success!

Reloading the privilege tables will ensure that all changes made so far
will take effect immediately.

Reload privilege tables now? [Y/n] y
 ... Success!

Cleaning up...

All done!  If you've completed all of the above steps, your MariaDB
installation should now be secure.

Thanks for using MariaDB!
That’s it, you have configured MySQL root password now.
Step 3. Install phpMyAdmin
phpMyAdmin package is available at the EPEL repository. Let’s install EPEL now then we can proceed with installing phpMyAdmin.
# dnf install https://dl.fedoraproject.org/pub/epel/epel-release-latest-10.noarch.rpm
# dnf update
Finally, we can install phpMyAdmin
# dnf install phpMyAdmin
Step 4. Configure Web Server
Apache
If you choose Apache, follow this step. We need to edit the file at /etc/httpd/conf.d/phpMyAdmin.conf
# nano /etc/httpd/conf.d/phpMyAdmin.conf
Append the following lines into the file.
<Directory /usr/share/phpMyAdmin/>
   AddDefaultCharset UTF-8

   <IfModule mod_authz_core.c>
     # Apache 2.4
     <RequireAny>
       #Require ip 127.0.0.1
       #Require ip ::1
       Require all granted
     </RequireAny>
   </IfModule>
   <IfModule !mod_authz_core.c>
     # Apache 2.2
     Order Deny,Allow
     Deny from All
     Allow from 127.0.0.1
     Allow from ::1
   </IfModule>
</Directory>
Save the file then restart Apache.
# systemctl restart httpd
You should be able to access phpMyAdmin at http://YOUR_SERVER_IP_ADDRESS/phpMyAdmin now.
Nginx
If you chose nginx over apache, after installing phpMyAdmin, we need to create an nginx server block.
# nano /etc/nginx/conf.d/phpMyAdmin.conf
Insert the following lines into the file.
server {
    listen 80 default_server;

    location /phpMyAdmin {
        root /usr/share/;
        index index.php index.html index.htm;
        location ~ ^/phpMyAdmin/(.+\.php)$ {
               try_files $uri =404;
               root /usr/share/;
               fastcgi_pass unix:/run/php-fpm/www.sock;
               fastcgi_index index.php;
               fastcgi_param SCRIPT_FILENAME $document_root$fastcgi_script_name;
               include /etc/nginx/fastcgi_params;
       }
       location ~* ^/phpMyAdmin/(.+\.(jpg|jpeg|gif|css|png|js|ico|html|xml|txt))$ {
               root /usr/share/;
       }
}
        location /phpMyAdmin {
            rewrite ^/* /phpMyAdmin last;
        }
}
Now, we can restart nginx.
# systemctl restart nginx
At this point, you should be able to access phpMyAdmin at http://YOUR_SERVER_IP_ADDRESS/phpMyAdmin
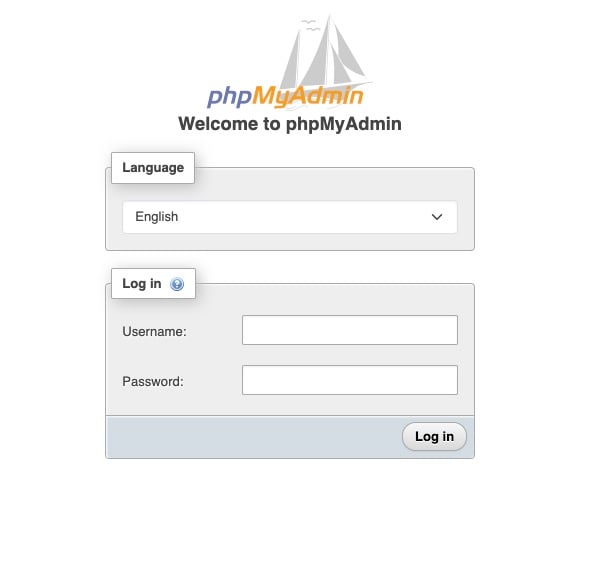
You can log in using root as username and its password you created earlier.
After logging in, you will see this message at the bottom of the page.

Simply click on the “Find out why” link then click “Create” to create a database called phpMyAdmin.
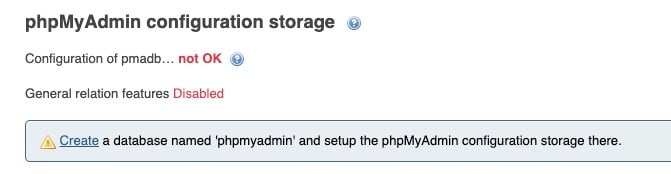
That’s it. You will not see the same message again when logging in to phpMyAdmin next time.
Congratulation! You have successfully installed phpMyAdmin on AlmaLinux 10.
If you want to host a database server with phpMyAdmin on a server with high-end hardware at an affordable price, look no further – our VPS hosting plans will let you host any software you want with dedicated resources.
Thanks for reading this tutorial – please share it with your peers if you found this guide helpful. You can also leave a comment if you liked the post or if you have any suggestions or concerns.