
In this tutorial we will show you how to install Redmine, along with its prerequisites such as MySQL, Ruby, and Nginx, on an Ubuntu 18.04 Cloud VPS.
![]() Redmine is an open source project management web app and issue tracking tool based on Ruby on Rails framework that allows users to manage projects flexibly while offering robust monitoring tools and a broad library of plug-ins. This free and open-source solution offers an alternative to management tools. We can track multiple projects in one installation, it has an integrated support for news, document management, file management, a support wiki, forum, calendars, and so on making it a very versatile platform. Let’s begin with the installation.
Redmine is an open source project management web app and issue tracking tool based on Ruby on Rails framework that allows users to manage projects flexibly while offering robust monitoring tools and a broad library of plug-ins. This free and open-source solution offers an alternative to management tools. We can track multiple projects in one installation, it has an integrated support for news, document management, file management, a support wiki, forum, calendars, and so on making it a very versatile platform. Let’s begin with the installation.
Prerequisites
- Ubuntu 18.04 Cloud VPS
- Ruby
- MySQL
- Nginx
- SSH access with root privileges, or an account with sudo privileges
Step 1. Log in via SSH and Update the System
Log in to your Ubuntu 18.04 Cloud VPS with SSH as a root user:
ssh root@IP_Address -p Port_number
Make sure to replace “IP_Address” and “Port_number” with their respective values for your server.
You can check whether you have the proper Ubuntu version installed on your server with the following command:
# lsb_release -a
You should get this output:
Distributor ID: Ubuntu
Description: Ubuntu 18.04.1 LTS
Release: 18.04
Codename: bionic
Then, run the following command to make sure that all installed packages on the server are updated to the latest available version.
# apt update && apt upgrade
We’ll also need to install some important packages that are prerequisites for the software we’ll be installing today.
# apt install curl subversion build-essential libmysqlclient-dev libmagickcore-dev libmagickwand-dev imagemagick g++ zlib1g-dev libyaml-dev libsqlite3-dev sqlite3 autoconf libgmp-dev libgdbm-dev libncurses5-dev automake libtool bison pkg-config libffi-dev libgmp-dev libreadline6-dev libssl-dev nginx mysql-server
Step 2. Install Ruby
Redmine was written on the Ruby on Rails framework, so we need to install Ruby.
| Redmine version | Supported Ruby versions | Rails version used |
|---|---|---|
| 4.0 | ruby 2.2 (2.2.2 and later), 2.3, 2.4, 2.5, 2.6 | Rails 5.2 |
| 3.4 | ruby 1.9.31, 2.0.0, 2.1, 2.2, 2.3, 2.4 | Rails 4.2 |
| 3.3 | ruby 1.9.31, 2.0.0, 2.1, 2.2, 2.3 | Rails 4.2 |
There are some options to install Ruby, using rbenv, rvm or from the apt repository. The easiest and fastest way is through the apt package manager. We can install Ruby by issuing this command:
# apt install ruby-full
Once installed, we can check the version by issuing this command:
# ruby -v

At the time of this blog writing, the Ruby version in Ubuntu 18.04 repository is 2.5.1p57. This is subject to change and is okay if the version is newer than the one shown here.
Step 3. Install Nginx Module and Passenger
These commands will install Passenger + Nginx module through Phusion’s APT repository.
# apt install -y dirmngr gnupg
# apt-key adv --keyserver hkp://keyserver.ubuntu.com:80 --recv-keys 561F9B9CAC40B2F7
# apt install -y apt-transport-https ca-certificates
echo deb https://oss-binaries.phusionpassenger.com/apt/passenger bionic main > /etc/apt/sources.list.d/passenger.list
# apt update
# apt install -y libnginx-mod-http-passenger
Once installed, make sure all config files exist
# if [ ! -f /etc/nginx/modules-enabled/50-mod-http-passenger.conf ]; then ln -s /usr/share/nginx/modules-available/mod-http-passenger.load /etc/nginx/modules-enabled/50-mod-http-passenger.conf ; fi
# ls /etc/nginx/conf.d/mod-http-passenger.conf
Restart the Nginx service to apply the changes.
# systemctl restart nginx
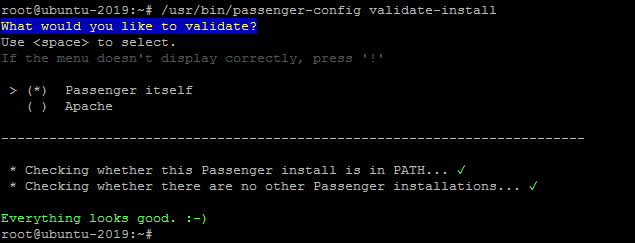
Now, we need to validate the installation, all checks should pass. Please run the following command to validate our install.
# passenger-config validate-install
Finally, check whether Nginx has started the Passenger core processes. Run /usr/sbin/passenger-memory-stats. You should see Nginx processes as well as Passenger processes, see the following picture for more details:
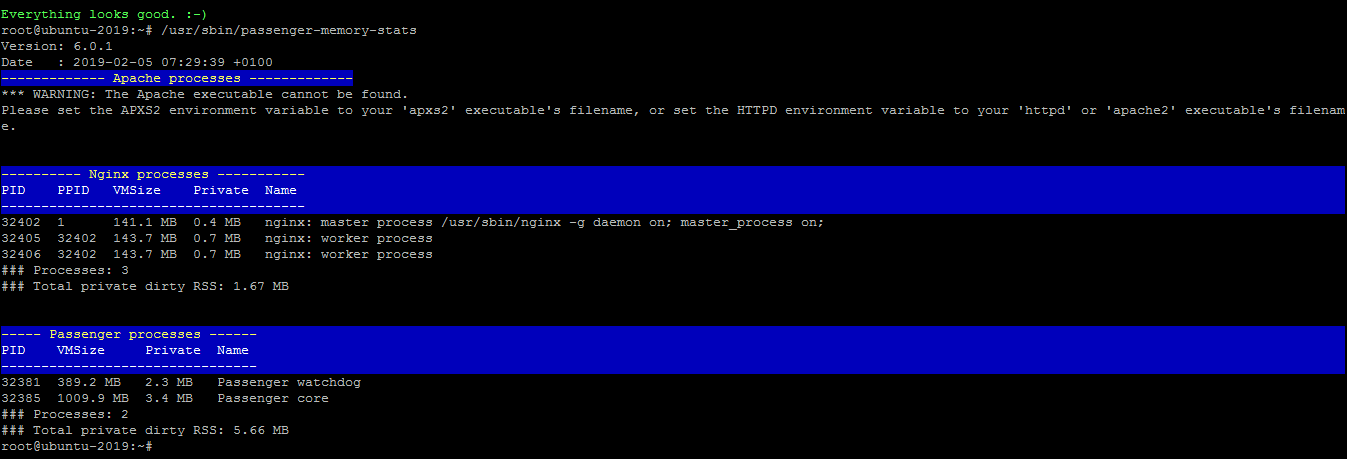
If you do not see the same as the picture above, most likely you have an issue with your installation or configuration.
Step 4. Create a Database and Configure it
Redmine supports MySQL, MariaDB, SQLite 3, Microsoft SQL Server, and PostgreSQL. We are going to use MySQL, and we installed MySQL server in the very first step of this tutorial
Now, you can skip the following step if you prefer not to have a MySQL root password set. However, we do recommend it as it helps improve the security of your MySQL install.
# mysql_secure_installation
When prompted, answer the questions below by following the guide.
Enter current password for root (enter for none): Just press the [Enter] key, the default password is empty
Set root password? [Y/n]: Y
New password: Enter password then press [Enter]
Re-enter new password: Repeat password then press [Enter]
Remove anonymous users? [Y/n]: Y
Disallow root login remotely? [Y/n]: Y
Remove test database and access to it? [Y/n]: Y
Reload privilege tables now? [Y/n]: Y
If you followed the above step, then you would have a password for MySQL root user, so you can run this command to access MySQL shell
# mysql -u root -p
Let’s proceed with creating a database for Redmine:
mysql> create database redmine_ubuntu;
mysql> grant all on redmine_ubuntu.* to redmine_ubuntu@localhost identified by 'm0d1fyth15';
mysql> flush privileges;
mysql> exit;
Please change the password ‘m0d1fyth15‘ above to your desired one. Your output should look something like this:

Step 5. Install Redmine
Before installing Redmine, we will download the latest stable version from Redmine’s official download page, you can check the latest version at https://www.redmine.org/projects/redmine/wiki/Download
wget http://www.redmine.org/releases/redmine-4.0.1.tar.gz -O /opt/redmine.tar.gz

tar -xzvf /opt/redmine.tar.gz

mv /opt/redmine-4.0.1 /opt/redmine
We created a database for thie Redmine installation in the previous step, we now need to copy a configuration sample file and connect it to our database.
cp /opt/redmine/config/database.yml.example /opt/redmine/config/database.yml
Edit the file using a file editor of your liking, we will use nano this time and complete the needed sections in the database.yml file. We will only need to edit the database name, database username, and database password in the “production” section.
nano redmine/config/database.yml
gem install bundler
bundle install --without development test
bundle exec rake generate_secret_token
RAILS_ENV=production bundle exec rake db:migrate
chown -R www-data: /opt/redmine
Step 6. Configure Nginx
Now, let’s edit the default nginx site configuration file. We need to modify the webroot location to point to our Redmine installation directory.
nano /etc/nginx/sites-enabled/default
Add/edit these lines:
root /opt/redmine/public;
passenger_enabled on;
client_max_body_size 20m;
Test the configuration and restart nginx
nginx -t
systemctl restart nginx
At this point, you should be able to access Redmine with your server IP address at http://1.2.3.4. Make sure to replace 1.2.3.4 with your server’s public IP address. If you want to access it using your domain, you can simply add an Nginx server block:
nano /etc/nginx/sites-enabled/yourdomain.com.conf
Add these lines and edit it to reflect your actual domain name by replacing “yourdomain.com” with your registered domain name.
server {
listen 80;
server_name yourdomain.com;
root /opt/redmine/public;
passenger_enabled on;
client_max_body_size 20m;
}
Save the file then restart Nginx.

Congratulations! You are now able to access your newly installed Redmine at http://yourdomain.com. For more information about Redmine along with its features and configuration, please check their official documentation.
 Of course, you don’t have to know how to Install Redmine on Ubuntu 18.04 if you have use one of our Ubuntu 18.04 Cloud VPS Hosting services. If you do, you can simply ask our support team to install Redmine on Ubuntu 18.04 for you. They are available 24/7, and will be able to help you with the installation of Redmine on Ubuntu 18.04.
PS. If you enjoyed reading this blog post on how to Install Redmine on Ubuntu 18.04, or if you found it helpful, feel free to share it on social networks using the shortcuts below, or simply leave a comment. Thank you.