
SuiteCRM is one of the most popular CRM application. It is a comprehensive CRM platform with comprehensive features, including sales management, marketing, customer service, and automation. SuiteCRM is ideal for businesses with complex needs. In this article, we will show you how to install SuiteCRM on AlmaLinux 10
Prerequisites
- An AlmaLinux 10 VPS with at least 4GB of RAM
- SSH root access or a regular system user with sudo privileges
Key Features: Lead management, contact management, opportunity management, marketing automation, case management, customer portal, reporting, and analytics.
Pros: Full-featured, high flexibility, large support community, integration with many other applications.
Cons: Requires significant resources for installation and configuration.
Conventions
# – given commands should be executed with root privileges either directly as a root user or by use of sudo command
$ – given commands should be executed as a regular user
Step 1: Update the System
First, you will need to log in to your AlmaLinux 10 VPS via SSH:
ssh master@IP_Address -p Port_numberYou will need to substitute ‘IP_Address’ and ‘Port_number’ with your server’s corresponding IP address and SSH port number. Furthermore, substitute ‘master’ with the username of the system user with sudo privileges.
You can verify whether you have the correct AlmaLinux version installed on your server with the subsequent command:
$ sudo cat /etc/almalinux-release You will see this message:
AlmaLinux release 10.0 (Purple Lion)Step 2. Install PHP
SuiteCRM supports PHP 8.3, and AlmaLinux 10 ships with PHP 8.3. So, we can install PHP directly using the default repository.
$ sudo dnf install php php-{bz2,ctype,curl,fpm,gd,intl,json,fileinfo,libxml,mbstring,mysqlnd,openssl,posix,session,simplexml,xmlreader,xmlwriter,zip,zlib}Once the installation is completed, the PHP-FPM service is running but is not enabled upon server reboot. You can check and verify the installed PHP version with this command.
$ php -vIt will return an output like this:
PHP 8.3.19 (cli) (built: Mar 12 2025 13:10:27) (NTS gcc x86_64)
Copyright (c) The PHP Group
Zend Engine v4.3.19, Copyright (c) Zend Technologies
    with Zend OPcache v8.3.19, Copyright (c), by Zend Technologies
Next, we need to modify the following settings in the php.ini file:
upload_max_filesize = 2MThe upload_max_filesize should be set at least to 6M
$ sudo sed -i 's/upload_max_filesize = 2M/upload_max_filesize = 6M/g' /etc/php.ini Now, let’s enable and start PHP-FPM.
$ sudo systemctl enable --now php-fpmStep 3. Install MariaDB Server
In this step, we are going to install MariaDB from the default AlmaLinux repository. To install MariaDB server, execute this command below:
$ sudo dnf install mariadb-serverTo make sure it starts automatically upon server reboot, let’s execute the command below to start MariaDB and let it start automatically upon server reboot.
$ sudo systemctl enable --now mariadb-serverAt this point, we can proceed with creating a new database and its user for our SuiteCRM website.
$ sudo mysql After logging in to MySQL shell, we can run these.
mysql> CREATE USER 'suitecrm'@'localhost' IDENTIFIED BY 'm0d1fyth15';
mysql> CREATE DATABASE suitecrm;
mysql> GRANT ALL PRIVILEGES ON suitecrm.* TO 'suitecrm'@'localhost';
mysql> FLUSH PRIVILEGES;
mysql> \q
Step 4. Install and Configure Nginx
In this article, we will use Nginx as the webserver. Let’s install it now.
$ sudo dnf install nginx -yThen, we need to create an nginx server block for our SuiteCRM website.
$ sudo nano /etc/nginx/conf.d/suitecrm.confInsert the following into the file.
upstream suitecrm {
server unix:/run/php-fpm/www.sock;
}

server {
        listen 80;

        root /var/www/html/suitecrm8/public;


        index index.php index.html;
        server_name suitecrm.yourdomain.com;


        location / {
                try_files $uri $uri/ /index.php?$args;
        }


        location ~ \.php$ {
                include fastcgi.conf;
                fastcgi_pass suitecrm;
              }
                location ~ /\.ht {
                deny all;
        }
}
Make sure to replace suitecrm.yourdomain.com with your actual domain or subdomain name. Save the file then exit and start nginx.
$ sudo systemctl enable --now nginxStep 5. Install SuiteCRM
To install SuiteCRM, we need to download the installation file first. Let’s download it now.
$ wget https://suitecrm.com/download/166/suite89/565627/suitecrm-8-9-1.zipTo get the more recent version, you can check their download page at https://suitecrm.com/download/
Once downloaded, we can extract the file.
$ sudo unzip suitecrm-8-9-1.zip -d /var/www/html/suitecrm8Now, we need to change the permissions.
$ sudo chown -R apache: /var/www/html/suitecrm8
$ cd /var/www/html/suitecrm8
$ sudo find . -type d -not -perm 2755 -exec chmod 2755 {} \;
$ sudo find . -type f -not -perm 0644 -exec chmod 0644 {} \;
$ sudo find . ! -user apache -exec chown apache: {} \;
$ sudo chmod +x bin/console
Now you should be able to access SuiteCRM with your domain name at http://suitecrm.yourdomain.com and complete the installation there.
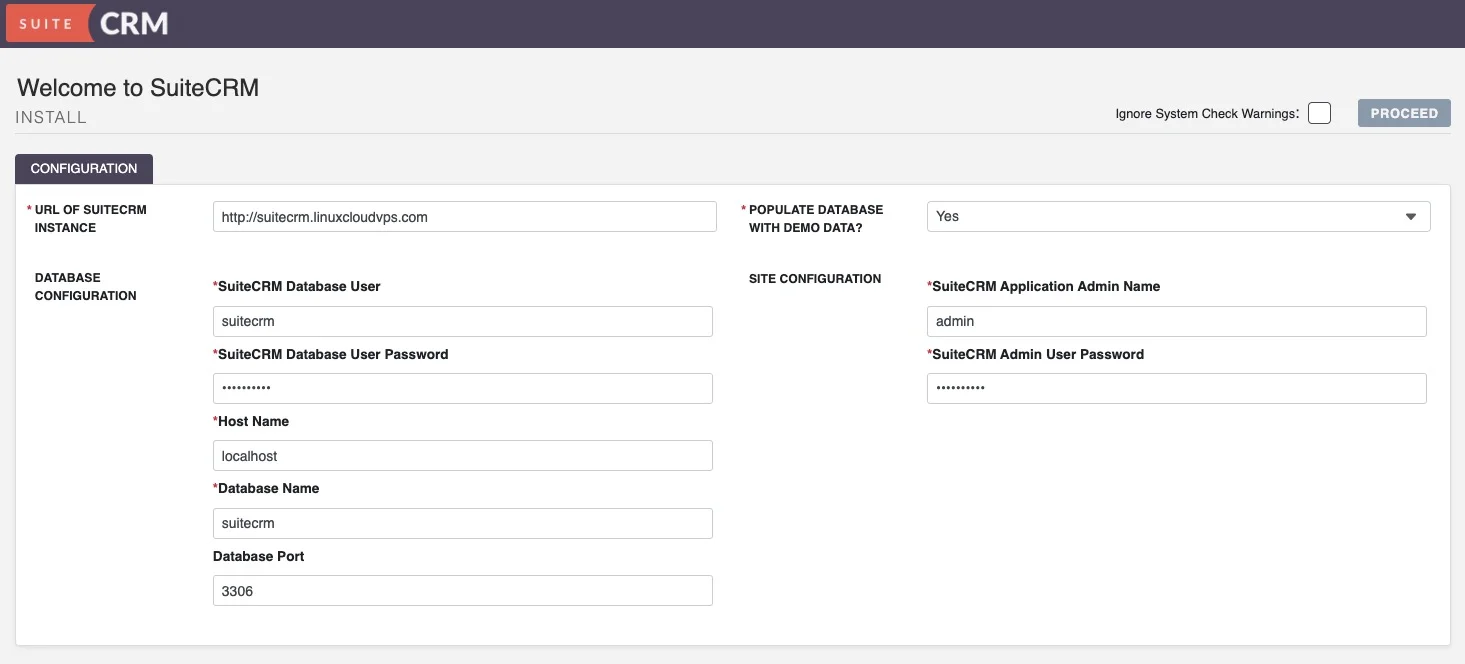
Here, you can fill all the form using the database details we created earlier. Do not forget to use a strong password for your SuiteCRM admin user. To continue, click on the PROCEED button.
Once installed, you can log in to the back end and start working on your project.
Congratulations!
You have successfully installed SuiteCRM on AlmaLinux 10.
If you want to host a SuiteCRM website with high-end hardware at an affordable price, look no further – our VPS hosting plans will let you host any software you want with dedicated resources.
Thanks for reading this tutorial – please share it with your friends if you found this guide on how to install SuiteCRM on AlmaLinux 10 helpful. You can also leave a comment if you liked the post or if you have any suggestions or questions.