
Wiki.js is an open-source project that runs a wiki engine using Node. It is a fully customizable and modular wiki engine written entirely in JavaScript. Wiki.js offers some useful features and it works perfectly smooth on different operating systems and environments. In this tutorial, we will show you how to install Wiki.js on Ubuntu 22.04.
Prerequisites
- Ubuntu 22.04 Cloud VPS
- SSH root access or a regular system user with sudo privileges
Step 1. Log in to the Server
First, log in to your Ubuntu 22.04 server using SSH as root:
ssh root@IP_Address -p Port_number
You will need to replace ‘IP_Address‘ and ‘Port_number‘ with your server’s respective IP address and SSH port number. Additionally, replace ‘root’ with the username of the system user with sudo privileges.
You can check whether you have the proper Ubuntu version installed on your server with the following command:
# lsb_release -a
You should get this output:
No LSB modules are available.
Distributor ID: Ubuntu
Description: Ubuntu 22.04 LTS
Release: 22.04
Codename: jammy
Before starting, you have to make sure that all Ubuntu OS packages installed on the server are up to date. You can do this by running the following commands:
# apt update -y
Step 2. Install NodeJS
Wiki.js requires the NodeJS runtime environment and npm (Node package manager). We can install NodeJS from the Ubuntu default repository, but we will get an older version of NodeJS if we use this method and Wiki.js requires at least NodeJS version 14. In this step, we will install NodeJS and npm through the NodeJS repository to get the most recent version of it.
# curl -sL https://deb.nodesource.com/setup_lts.x | sudo -E bash -
Once completed, we need to download the package information from the newly added source above.
# apt update
Next, run the following command to finally install NodeJS and NPM.
# apt install nodejs
That’s it, NodeJS and NPM are installed. You can check the installed version by executing this one-liner:
# node -v; npm -v
You will see an output like this:
root@ubuntu22:~$ node -v; npm -v
v18.17.1
9.6.7
Step 3. Install MariaDB and Create a Database
Wiki.js supports several database engines, like PostgreSQL, MariaDB, MySQL, SQLite3 and MSSQL. In this step, we are going to install MariaDB server from the default Ubuntu repository. To install MariaDB server, invoke this command below:
# apt install mariadb-server
On an Ubuntu system, the MariaDB server will be running automatically upon installation. Therefore, we can now continue by creating a fresh database and database user for our Wiki.js website. Let’s log in to MySQL shell as user root and create a database for our Wiki.js website.
# mysql
Once logged in to MySQL shell, we can execute the following commands.
mysql> CREATE DATABASE wikijs;
mysql> GRANT ALL on wikijs.* to wikijs@localhost identified by 'm0d1fyth15';
mysql> FLUSH PRIVILEGES;
mysql> \q
Make sure to create a more complicated database password, substitute m0d1fyth15 in the command above with a better and stronger one.
Step 4. Install Wiki.js
In this step, we will create a new system user and grant it with sudo privileges. We will also use this user to complete this installation. In this tutorial, we will create a new system user called ‘wikijs’, you can choose any username you like.
# useradd -m -d /opt/wikijs -U -r -s /bin/bash wikijs
Once added, we can switch to that use and do the rests.
# su - wikijs
Then, we need to download the Wiki.js installation file.
$ wget https://github.com/Requarks/wiki/releases/latest/download/wiki-js.tar.gz
Once downloaded, we can extract it.
$ tar -xzvf wiki-js.tar.gz
The files are extracted in /opt/wikijs, let’s proceed to the next step.
Step 5. Configure Wiki.js
The Wiki.js file has been downloaded and extracted. It is time to configure it to connect to the database we created earlier.
$ cp -a config.sample.yml config.yml
Let’s edit the config.yml file.
$ nano config.yml
Find these lines.
db:
  type: postgres

  # PostgreSQL / MySQL / MariaDB / MS SQL Server only:
  host: localhost
  port: 5432
  user: wikijs
  pass: wikijsrocks
  db: wiki
And, change the database type ‘postgres’ with ‘mariadb’, also use port 3306 instead of 5432. The lines should look like this:
db:
  type: mariadb

  # PostgreSQL / MySQL / MariaDB / MS SQL Server only:
  host: localhost
  port: 3306
  user: wikijs
  pass: m0d1fyth15
  db: wikijs
Save the file then exit from the editor. You can also exit from user ‘wikijs’ and back to your root or sudo user.
$ exit
Step 6. Create Systemd File
To run and manage the wikijs service, we can create a systemd file.
# nano /etc/systemd/system/wikijs.service
Insert the following into the file.
[Unit]
Description=Wiki.js
After=network.target

[Service]
Type=simple
ExecStart=/usr/bin/node server
Restart=always

User=wikijs
Environment=NODE_ENV=production
WorkingDirectory=/opt/wikijs

[Install]
WantedBy=multi-user.target
Save the file, exit, and reload the systemd daemon.
# systemctl daemon-reload
Once reloaded, we can run wikijs and enable it upon server reboot.
# systemctl enable --now wikijs
That’s it, Wiki.js should be up and running. You should be able to access it at http://YOUR_SERVER_IP_ADDRESS:3000
Step 7. Install and Configure Nginx
Wiki.js is up and running on port 3000 now. To access it on a domain or subdomain, we need to create and configure a reverse proxy. In this step, we will install Nginx and create an Nginx server block for our Wiki.js website.
# apt install nginx
On an Ubuntu system, Nginx will be up and running upon installation. Now, let’s create a server block to accomodate our Wiki.js website.
# nano /etc/nginx/sites-enabled/wikijs.conf
Insert the following into the file above.
server {
  listen 80;
  server_name  wikijs.yourdomain.com;
  root   /opt/wikijs;

    location / {
    proxy_pass          http://127.0.0.1:3000;
    proxy_http_version  1.1;
    proxy_set_header    Upgrade $http_upgrade;
    proxy_set_header    Connection "upgrade";
    proxy_set_header    Host $host;
    proxy_set_header    X-Real-IP $remote_addr;
    proxy_set_header    X-Forwarded-For $proxy_add_x_forwarded_for;
    proxy_set_header    X-Forwarded-Proto $scheme;
  }
}
Make sure to adjust wikijs.yourdomain.com to the domain or subdomain you want to use.
Save the file then exit from the editor. Then, we need to restart Nginx for the changes to take effect.
# systemctl restart nginx
Now, at this point, you should be able to access Wiki.js at http://wikijs.yourdomain.com and complete the installation through a web browser.
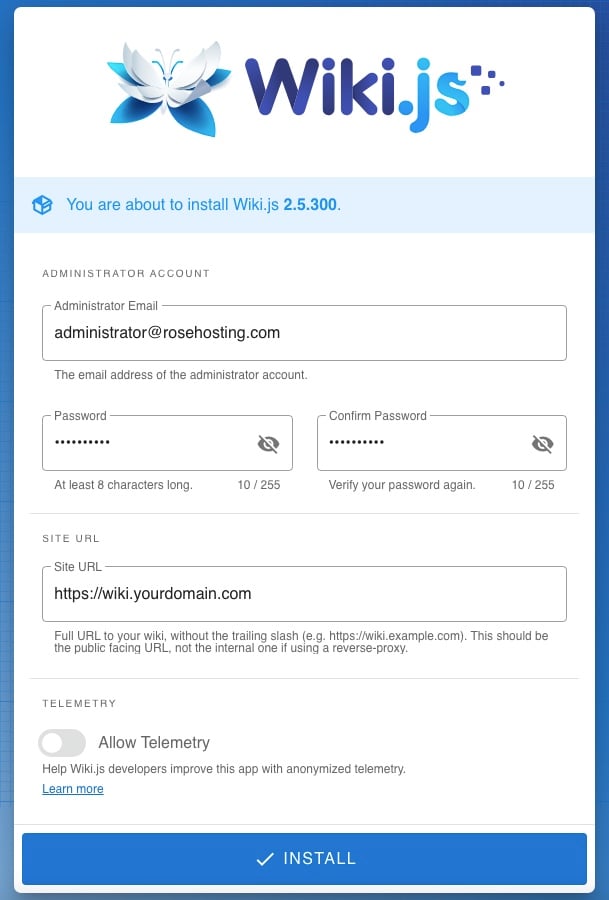
Click on the Install button to continue, then you will be brought to the login page.
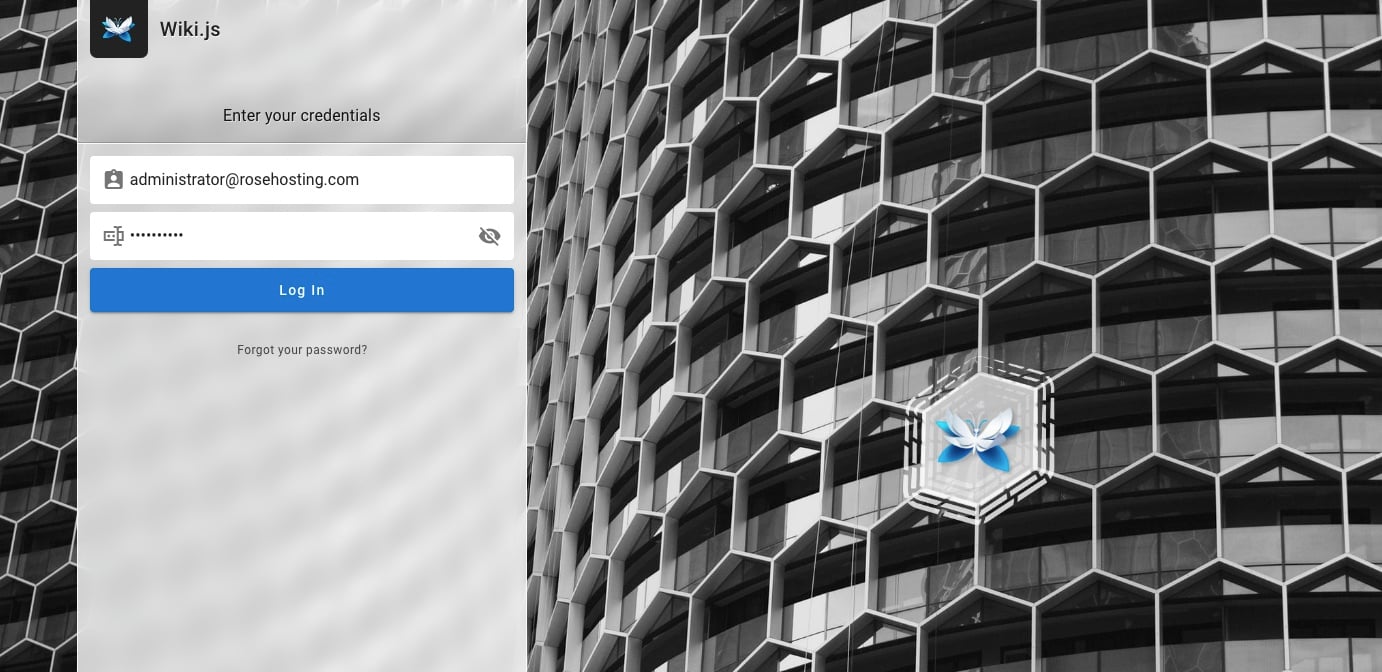
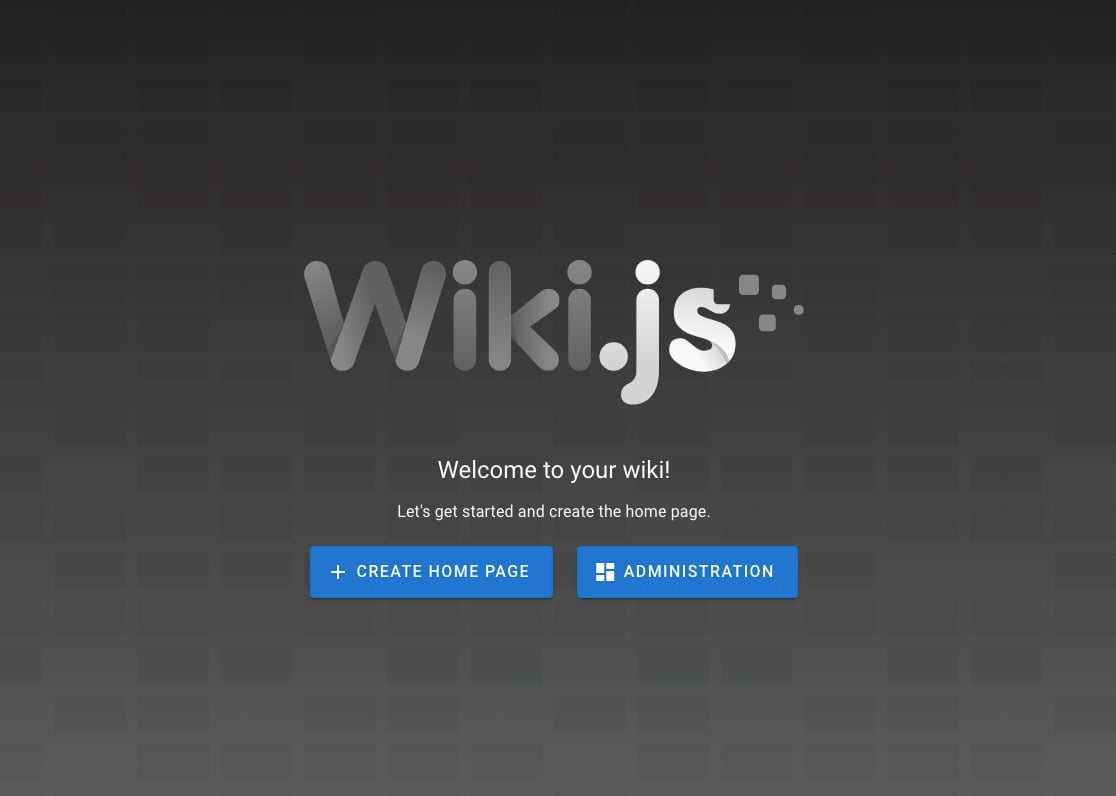
Log in with the email and password you created earlier. You will see the welcome page to create a page or access the administration page.
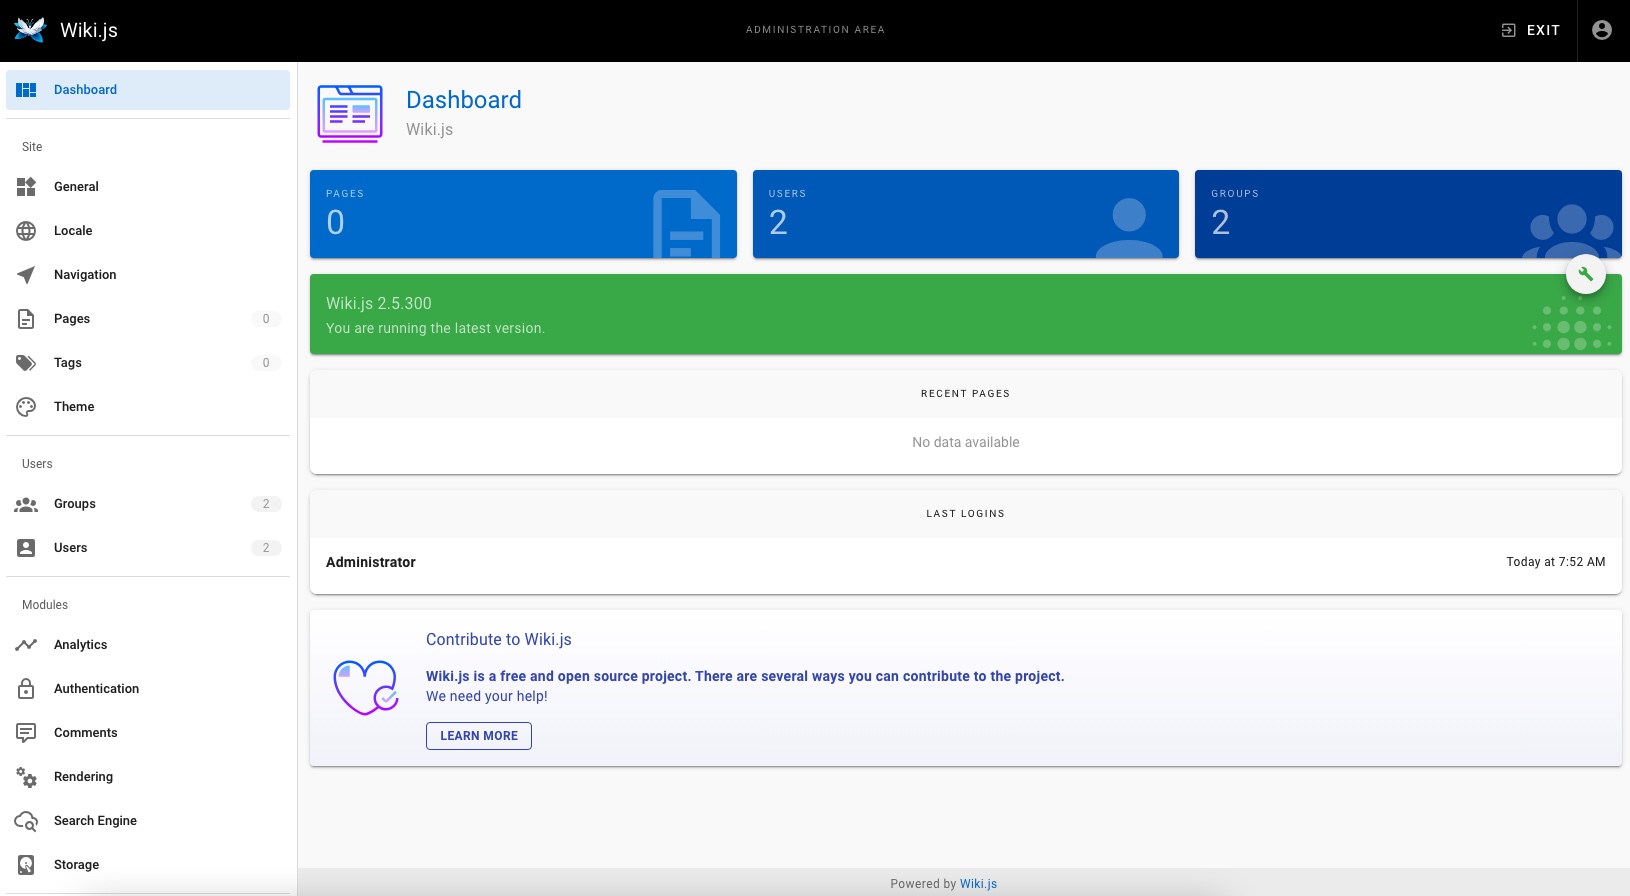
You can start working and customizing your website by accessing the backend.
Congratulations! You have successfully installed Wiki.js on your Ubuntu Cloud Hosting. For more information about Wiki.js, please refer to the Wiki.js website.
PS. If you liked this post on how to install Wiki.js On Ubuntu 22.04, please share it with your friends on social networks or simply leave a reply below. Thanks.