Today we will show you, how to install ionCube on Ubuntu 16.04. ionCube is a PHP encoder which is being used to convert readable source code written in PHP to bytecode making it unreadable to other users. It improves the security and speed of scripts written in PHP. To be able to run ionCube encoded and secured PHP scripts, you need to have ionCube Loader installed on your Linux Cloud VPS. In this tutorial, we will show you how to install ionCube Loaders on Ubuntu 16.04.
Check PHP version on Ubuntu 16.04
Before you start with the installation process, check the version of PHP running on your server. The easiest way to do this is to place an info.php file in your web server document root and access the file via web browser. Paste the following code in the info.php file:
<?php
phpinfo();
?>
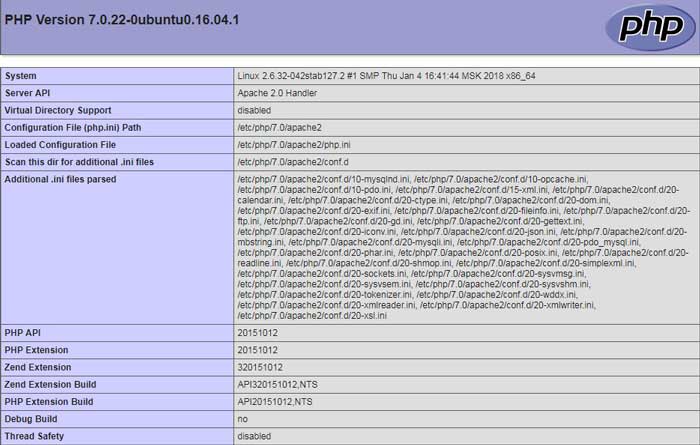
Once you access the site via browser you will be presented with a page similar to the one below.
Take a note of the PHP version as well as whether you are using 32-bit or 64-bit version of PHP. Also, take a note of the directory where the other .ini files are located and the extension directory, since you will need them later.
Download and Install ionCube on Ubuntu 16.04
To download the ionCube archive you can use a tool like wget for example. If you don’t have wget already installed on your Ubuntu VPS, you can install it using the following commands:
apt-get update
apt-get install wget
Then, download and extract the ionCube loader archive:
cd /opt
wget http://downloads3.ioncube.com/loader_downloads/ioncube_loaders_lin_x86-64.zip
unzip ioncube_loaders_lin_x86-64.zip
Now, copy the ionCube loader extension that matches your PHP version into the PHP extension directory. Depending on your setup, the directory may be different than the one in our example. You can find the PHP extension directory by checking the info.php file via web browser. In our example, we need to copy ioncube_loader_lin_7.0.so into to the /usr/lib/php/20151012 directory.
cd /opt/ioncube/
cp ioncube_loader_lin_7.0.so /usr/lib/php/20151012/
The next step is to load the extension in PHP. Create a new .ini file for the ionCube extension in the same directory as the other PHP extensions. In our example, it is /etc/php/7.0/apache2/conf.d
nano /etc/php/7.0/apache2/conf.d/00-ioncube.ini
Paste the following content:
zend_extension = "/usr/lib/php/20151012/ioncube_loader_lin_7.0.so"
Save and close the file. Finally, restart your Apache service so the changes can take effect.
systemctl restart apache2
In case you are using Nginx/PHP-FPM, you can use the following commands to restart the services:
systemctl restart nginx
systemctl restart php7.0-fpm
Now, access the info.php file via web browser again. You will see something like this:
This means you have ionCube loaders successfully installed on your Ubuntu VPS.
Of course, you don’t have to install ionCube on Ubuntu 16.04, if you use one of our Linux Cloud VPS Hosting services, in which case you can simply ask our expert Linux admins to install ionCube on Ubuntu 16.04 for you. They are available 24×7 and will take care of your request immediately.
PS. If you liked this post on how to install ionCube on Ubuntu 16.04, please share it with your friends on the social networks using the buttons on the left or simply leave a reply below. Thanks.


