
In this tutorial, we will be installing Anaconda Python on one of our fully managed CentOS 7 Cloud VPSes.
 Anaconda Python is an open-source programming language based on a Python distribution that is specifically developed for scientific computing and large amounts of data processing. The Anaconda library has over 200 packages ready out-of-the-box and over 2000 downloadable packages, all of which enable developers and enthusiasts to better develop their data science related applications almost instantly. Also, Anaconda package ships with Conda, a command-line tool and the package manager for Anaconda, which provides management of libraries, dependencies, and different environments.
Here are some of Anaconda’s capabilities in terms of scientific computing and a wide range of data processing:
- Data Science
- Machine Learning
- Artificial Intelligence
- Data Analytics
- Neural Networks
- Graphical Representation
Anaconda is developed and maintained by Anaconda, Inc. under the new BSD license and is written using Python.
This is a step-by-step instruction on how to get your Anaconda environment running in no time. First, let’s start with the server requirements.
Prerequisites
Before setting up your Anaconda Python environment, ensure that you have met the following basic requirements:
- A 64-bit processor installed in your server
- CentOS 7 installed
- An account with root privileges or access to the root account (this comes included with our servers)
- A minimum of around 5 GB of free disk space for download and install
Step 1: Installing Updates and Dependencies
Of course, we first need to access the server using SSH. To initiate the connection, type the following on your OS’s terminal:
ssh <strong>[user]</strong>@<strong>[public_server_ip_address]</strong>
Modify the [user] and [public_server_ip_address] variables depending on your online server’s credentials. You may also need to specify a port number if your SSH server is set up to use a non-standard port.
Once logged in, we always recommend to check for package updates as they may contain bug fixes, new features, and general improvements:
yum update -y
We can also set up the EPEL release repository and the basic dependencies to avoid unexpected missing dependencies during installation:
yum install epel-release -y
yum groupinstall -y "Development Tools"
Step 2: Installing Anaconda
As of writing this article, the latest version of Anaconda available for Linux is Anaconda 2019.03. Since Python 2.7 will retire in 2020, we will be using the one with Python 3.7 for this tutorial.
First, we need to download the official Anaconda installation script.
cd /opt
wget https://repo.anaconda.com/archive/Anaconda3-2019.03-Linux-x86_64.sh
The script file is a pretty large file and may take some time to download. Once downloaded, we can now run the script using bash:
bash /opt/Anaconda3-2019.03-Linux-x86_64.sh
After running the command, you should see the following message:
<em>Welcome to Anaconda3 2019.03 In order to continue the installation process, please review the license agreement. Please, press ENTER to continue >>></em>
After pressing enter, you will be shown the Anaconda End User License Agreement. Simply press your ENTER key until you see the following:
<em>Do you accept the license terms? [yes|no]</em> <em>[no] >>></em>
Type yes and press [enter].
The next question is where you want the Anaconda distribution to be installed. For this tutorial, we will leave it to the default location, which is /root/anaconda3. Proceed by pressing [enter].
<em>Anaconda3 will now be installed into this location:</em>
<em>/root/anaconda3</em>

<em>- Press ENTER to confirm the location</em>
<em>- Press CTRL-C to abort the installation</em>
<em>- Or specify a different location below</em>
Finally, the installation will now start. The script will install Python 3.7.x and other dependencies required by Anaconda.
Once the installation is done, you should see almost the same output:
<em>installation finished.</em> <em>Do you wish the installer to initialize Anaconda3</em> <em>by running conda init? [yes|no]</em> <em>[no] >>></em>
Provide yes as an answer for the script to initialize our Anaconda 3 installation. The script will make changes to your environment variables. To active the changes in your current session, run the following command:
source ~/.bashrc
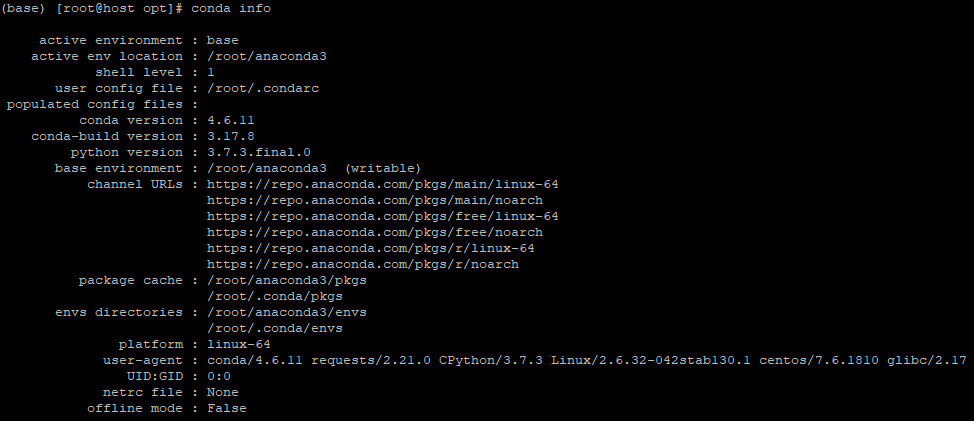
To verify if Anaconda has been initialized properly, we can use the conda script to produce info about our active environment. By default, we are using the base environment.
Step 3: Updating Anaconda
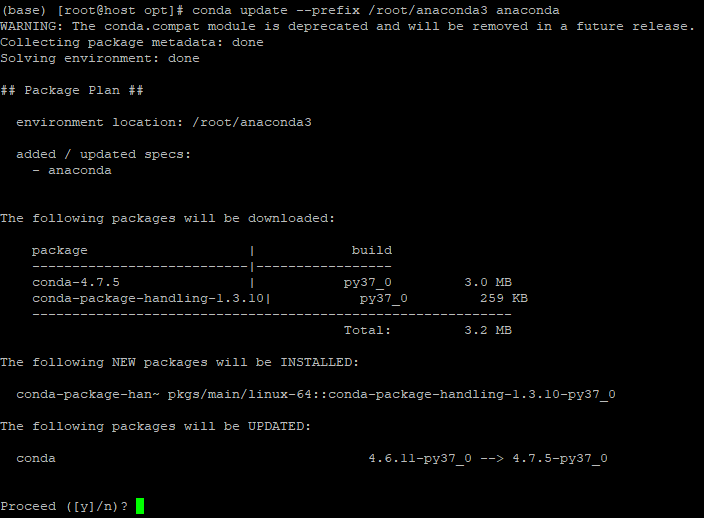
First, we recommend checking for Anaconda updates. To do that, type the following:
conda update --prefix <strong>[Anaconda installation directory]</strong> anaconda
If an update is available, type y to proceed.
Step 4: Testing Anaconda
Finally, we can test our Anaconda installation’s ability to create different environments.
<span class="n">conda</span> <span class="n">create</span> <span class="o">--</span><span class="n">name</span> <strong><span class="n">[environment name]</span></strong>
Respond to the prompt with y if asked to proceed. Finally, activate the newly created environment:
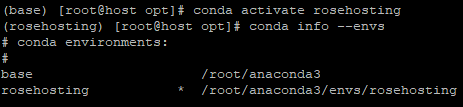
conda activate <strong><span class="n">[environment name]
</span></strong>
After changing the active environment, you should see your terminal switch to your new environment.
To check for all Conda environments available and currently active, run the following:
conda info --envs
The active environment is the one with an asterisk ( * ) beside the location.
That’s it – you have now set up a working Anaconda environment on your CentOS 7 server. You can now start working with your data!
 Of course, you don’t have to install Anaconda Python on CentOS 7 if you have a Managed CentOS Cloud VPS with us. In that case, you can simply ask our support team to install Anaconda Python on CentOS 7 for you. They are available 24/7, and they will be able to help you with the installation.
PS. If you enjoyed reading this blog post on how to install Anaconda Python on CentOS 7, feel free to share it on social networks by using the shortcuts below, or simply leave a comment in the comments section. Thanks.