In this tutorial, we will show you how to install Elgg on a CentOS 7 Cloud VPS.

Elgg also offers many additional features, including blogging, micro-blogging, networking, groups, and much more. Let’s start installing Elgg.
Requirements:
- For the purposes of this tutorial, we will be using a CentOS 7 Cloud VPS.
- You will also need a working LAMP or LEMP (Linux, Apache/Nginx, MySQL, PHP) stack.
- Full SSH root access or a user with sudo privileges is also required. (our Cloud VPSes all come with root access included)
Don’t worry if some of these are missing, we will be covering everything that’s needed for Elgg to work on a CentOS 7 server.
Step 1: Connect to Your Server
Before we begin, you will need to connect to your server via SSH as the root user or as any other user that has sudo privileges.
To connect to your server as the root user, use the following command:
ssh root@<span style="color: #ff0000;">IP_ADDRESS</span> -p <span style="color: #ff0000;">PORT_NUMBER</span>
Make sure to replace IP_ADDRESS and PORT_NUMBER with your actual server IP address and SSH port number.
Once logged in, make sure that your server is up-to-date by running the following command:
sudo yum update
This will refresh your repository list and update any out-of-date packages on your system.
Step 2: Install LAMP
Before we proceed with the Elgg installation, we will need to prepare our server and set up a LAMP stack. If you already have a working LAMP installed on your server, you can skip this and go to the next step of this tutorial, just make sure that you configure your stack correctly.
To install the Apache web server, a popular and easy to use web server, run the following command:
yum install httpd
To install the MariaDB database server, an open-source version of the MySQL database server, enter the following command:
yum install mariadb-server
When the MariaDB installation is complete, you can also run the following command to secure your MariaDB installation. It’s optional, but we strongly recommend securing it:
sudo mysql_secure_installation
If the program asks you to enter your current MariaDB root password, just press your [Enter] key once, as no password is set by default when installing MariaDB.
A few more questions will be displayed on-screen – it is recommended that you answer yes to all of them by entering the character ‘Y’:
Remove anonymous users? (Press y|Y for Yes, any other key for No) : Y
Disallow root login remotely? (Press y|Y for Yes, any other key for No) : Y
Remove test database and access to it? (Press y|Y for Yes, any other key for No) : Y
Reload privilege tables now? (Press y|Y for Yes, any other key for No) : Y
You will also need to enable MariaDB and Apache to start on boot with:
sudo systemctl enable httpd
sudo systemctl enable mariadb
To enable the PHP 7.2 repository on your server, run the following commands:
sudo yum install https://dl.fedoraproject.org/pub/epel/epel-release-latest-7.noarch.rpm
sudo yum install yum-utils
sudo yum install http://rpms.remirepo.net/enterprise/remi-release-7.rpm
sudo yum-config-manager --enable remi-php72
To install PHP 7.2 along with the other extensions required by Elgg, run the following command:
sudo yum install php72 php72-php php72-php-mysqlnd php72-php-opcache php72-php-xml php72-php-xmlrpc php72-php-gd php72-php-mbstring php72-php-json
To verify that PHP 7.2 is successfully installed, run the following command:
php72 -v
You should get the following output on your screen:
PHP 7.2.18 (cli) (built: Apr 30 2019 14:41:03) ( NTS )
Copyright (c) 1997-2018 The PHP Group
Zend Engine v3.2.0, Copyright (c) 1998-2018 Zend Technologies
with Zend OPcache v7.2.18, Copyright (c) 1999-2018, by Zend Technologies
Step 3: Download Elgg
We now have our LAMP stack set up, and we can start with our Elgg installation and configuration.
Let’s download the latest stable Elgg version from this link. At the moment of writing this tutorial, the latest stable version is Elgg 3.0.2. To download this version on your server, you can run the following command. We added the download link in the command for you:
sudo wget https://elgg.org/download/elgg-3.0.2.zip
Let’s extract the files to the /var/www location on our server with this:
sudo unzip elgg-3.0.2.zip -d /var/www
Note: If you don’t have the unzip package installed on your server, you can install it with the following command: yum install unzip
Rename the elgg-3.0.2 directory to elgg:
sudo mv /var/www/elgg-3.0.2 /var/www/elgg
Elgg needs a special folder to store uploaded files including profile icons and photos. For security reasons, it is also recommended for this directory to be created outside the document root directory of our Elgg installation. The directory will be called data and you can create it with the following command:
sudo mkdir -p /var/www/data
The owner of all these files needs to be the user of the web server running on your system. In our example, we are using the Apache web server and Apache runs under the “apache” user on CentOS 7. To change the owner and set the correct permissions for these files, you need to run the following command:
sudo chown -R apache:apache /var/www/elgg
sudo chown -R apache:apache /var/www/data
sudo chmod -R 750 /var/www/elgg
Step 4: Configure the Database
Next, we need to create a new database for our Elgg application. To do this, log in to your MariaDB database server as the root user by typing the following command:
sudo mariadb -u root -p
Then enter the password you made for your MariaDB user, if you chose to set one. Once you are signed in, create a new database and user by running the following commands on the MariaDB shell:
CREATE DATABASE <span style="color: #ff0000;">elgg_db</span>;
CREATE USER <span style="color: #ff0000;">elgg_user</span>@localhost IDENTIFIED BY '<span style="color: #ff0000;">strong-password</span>';
GRANT ALL PRIVILEGES ON <span style="color: #ff0000;">elgg_db</span>.* TO <span style="color: #ff0000;">elgg_user</span>@localhost;
FLUSH PRIVILEGES;
You can replace the database and username with your own and also make sure to replace strong-password with an actual strong password.
To exit the MariaDB database server command line, type:
exit
Now that our database is configured, we’ll need to configure our web server next.
Step 5: Configure Apache
In this step, we will show you how to create a virtual host file for Apache – this is so you can access your Elgg instance by using your domain name.
Create the virtual host file by executing the following command:
sudo nano /etc/httpd/conf.d/elgg.conf
And enter the following information:
<VirtualHost *:80>
DocumentRoot /var/www/elgg/
ServerName <span style="color: #ff0000;">mydomain.com</span>
<Directory /var/www/elgg/>
Options FollowSymlinks
AllowOverride All
Require all granted
</Directory>
ErrorLog /var/log/httpd/elgg_error.log
CustomLog /var/log/httpd/elgg_access.log combined
</VirtualHost>
In our example, we will use a domain called mydomain.com. Make sure to replace mydomain.com with your actual domain/subdomain name that you would like to use for your Elgg instance.
Reload your Apache server in order to activate the new configuration:
sudo systemctl reload httpd
If there are no errors, we can now install Elgg.
Step 6: Installing Elgg
You can now navigate to http://mydomain.com in your browser to start the Elgg installation wizard.
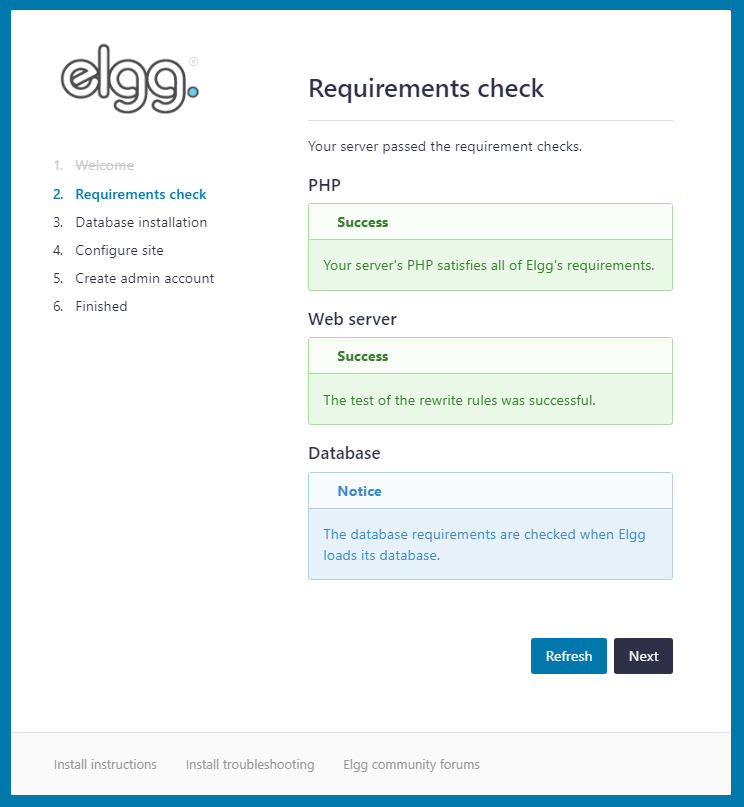
The first page will check if all server requirements are met. If there are some missing dependencies, you should install them on your server and then refresh the page again. Once you make sure everything is set up properly, you can click on “Next” at the bottom of the page to continue to the next step.
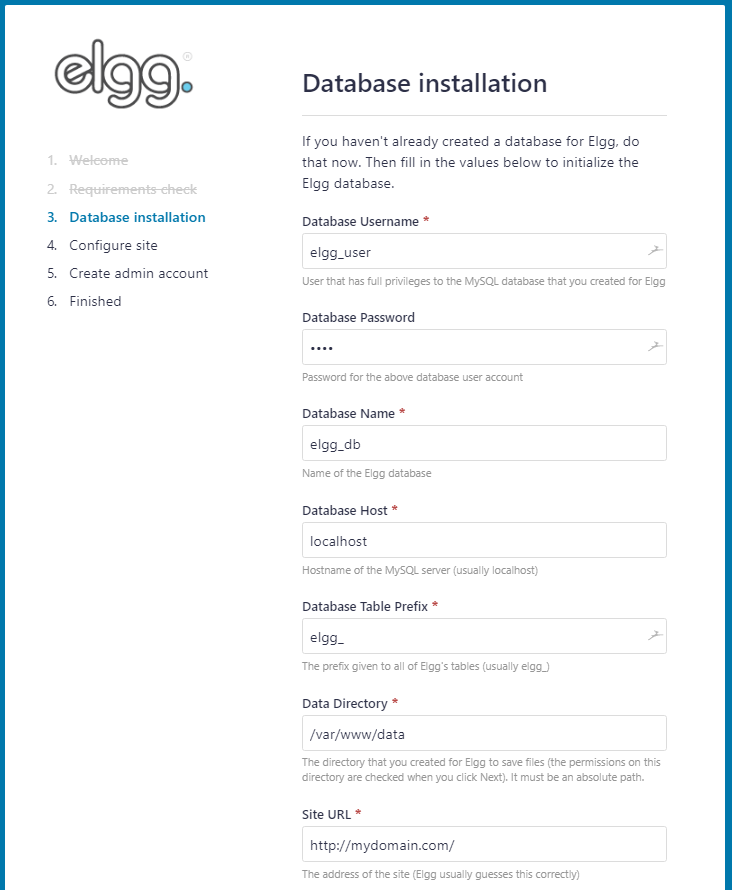
On the next page, you need to enter your database information (username, database name and password). You will also need to enter the Data Directory path (/var/www/data) and enter your Site URL (http://mydomain.com/):
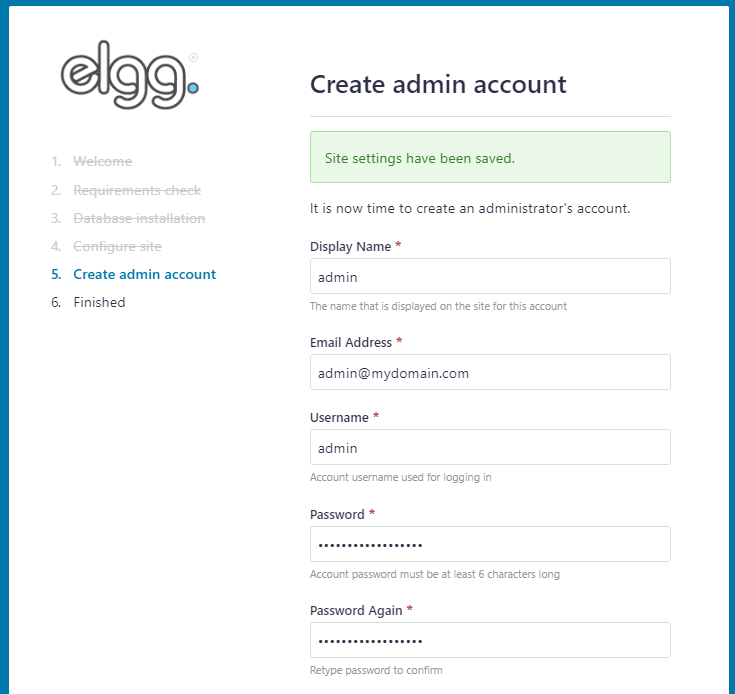
Next, you will need to enter your Site name and create an admin account before finishing the installation.
Once this is done, Elgg has been successfully installed on your system.
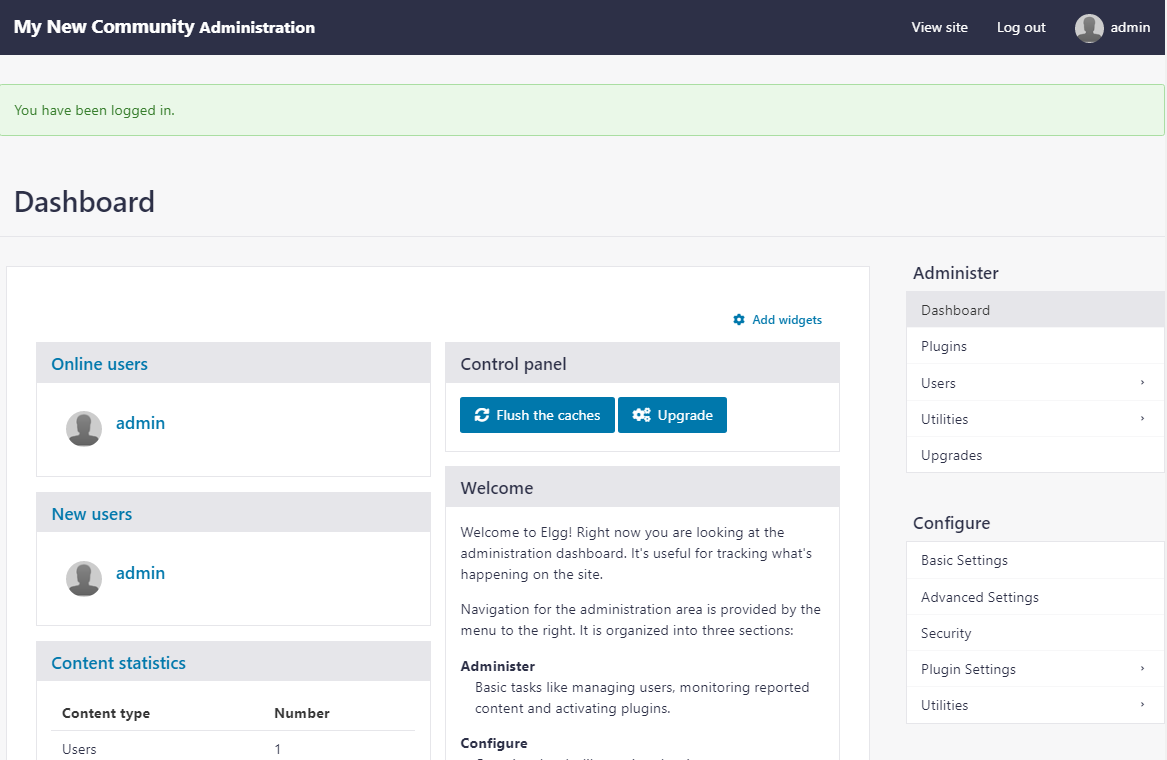
You can now access your admin panel and login with your admin account at http://mydomain.com/admin
That’s it! Elgg has been successfully installed on your CentOS 7 server.

PS. If you enjoyed reading this blog post on how to install Elgg on CentOS 7, feel free to share it on social networks by using the share shortcuts, or simply leave a comment in the comments section. Thank you.
