
Mailman is an open-source application for managing electronic mail discussions and newsletter lists. It is written in Python, and since Python 2.7 is EOL, it is important to use Mailman3, not Mailman2. Mailman 3 is actually a suite of 6 subprojects; it is known as The Mailman Suite:
- Mailman Core – The core delivery engine.
- Postorius – A new Django-based web user interface for end users and list administrators.
- HyperKitty – A new Django-based web archiver.
- mailman-hyperkitty – A plugin for the core to communicate with HyperKitty.
- django-mailman3 – Django modules and templates common to Postorius and HyperKitty
- mailmanclient – The official Python 2 and 3 bindings to the administrative REST API.
In this tutorial, we will show you how to install Mailman3 on Debian 11.
Prerequisites
- A Debian 11 VPS
- SSH access with sudo privileges, or root access
Step 1. Update System
First of all, we need to log in to our Debian 11 VPS through SSH:
ssh master@IP_Address -p Port_number
Replace “master” with a user with sudo privileges or root if necessary. Additionally, replace “IP_Address” and “Port_Number” with your server’s respective IP address and SSH port number. Next, let’s make sure that we’re on Debian 11. You can do that like this:
# lsb_release -a
You should get this as the output:
Distributor ID: Debian
Description: Debian GNU/Linux 11 (bulleseye)
Release: 11
Codename: bullseye
Then, run the following command to make sure that all installed packages on the server are updated to their latest available versions:
# apt update && apt upgrade
In this article, we use “root” to execute the shell commands, if you use a sudoer user do not forget to add ‘sudo’ in front of the commands.
Step 2. Install and Configure Apache
In this step, we will install apache as the web server, PHP, and its extensions.
# apt install apache2 php7.4-{bcmath,common,curl,fpm,gd,intl,mbstring,mysql,soap,xml,xsl,zip,cli}
On Debian 11, apache will start running upon installation. We do not need to install a new apache virtual host; the mailman3 installation created this virtual host in /etc/mailman3/apache.conf. So, we just need to create a hyperlink or include that file, or you can also copy the file to apache configuration.
# ln -s /etc/mailman3/apache.conf /etc/apache2/conf-enabled/mailman3.conf
Next, we need to enable the proxy_uwsgi module and restart apache.
# a2enmod proxy_uwsgi
# systemctl restart apache2
Step 3. Install Postfix
This tutorial requires a working mail server prior to installing mailman3. Since the mailman3 default configuration is using postfix, let’s install it.
# apt install postfix
Learn more about the detailed steps to install and configure postfix on your Debian 11 system.
You can choose to install Exim, but you need to modify the Mailman configuration file to get it to work with Exim
Step 4. Install Mailman
There are several ways to install mailman3, like using the Debian repository, Python virtual environment, docker container, etc. In this step, we are going to install mailman3 from the default Debian 11 repository.
# apt install mailman3-full mailman3-web
The command above will install the mailman 3 core mailinglist delivery daemon and the Mailman 3 Django web suite with Postorius and Hyperkitty. Upon installation, both mailman3 and mailman3-web services should run automatically.
Step 5. Configure Mailman
There are several default configurations we need to modify.
Let’s open /etc/mailman3/mailman.cfg
# nano /etc/mailman3/mailman.cfg
This line you would want to modify.
site_owner: [email protected]
As informed earlier in the previous step, in the mailman configuration file, mailman uses postfix as the MTA. If you want to use Exim, you can uncomment the line
#incoming: mailman.mta.exim4.LMTP
and comment
incoming: mailman.mta.postfix.LMTP
Also, in [mta], you can specify the SMTP credentials if you want to use SMTP to send emails. By default, mailman will use the localhost and port 25 without smtp username and password to send the emails.
The mailman-web configuration file is located at /etc/mailman3/mailman-web.py. In this file, we can specify our domain, database configuration, etc. Let’s open this file and configure several things.
# nano /etc/mailman3/mailman-web.py
Find these lines
ADMINS = (
('Mailman Suite Admin', 'root@localhost'),
)
In that section, we can edit the email address to something like [email protected].
We would not need to modify the database setting section; we will use SQLite3. But, if you want to use a database other than the default one, you can modify this setting.
Scroll down, then find the EMAILNAME section.
EMAILNAME = 'localhost.local'
You need to edit this and replace ‘localhost.local’ with your actual domain name, and make sure that the domain is using this server as the mail server, for the sake of email deliverability.
That is all. To apply the changes, we need to restart mailman3-web. But, if you didn’t follow the postfix installation step and choose Exim as the mail server instead, you need to modify
# systemctl restart mailman3-web
To check your mailman configuration, you can execute this command:
# mailman info
The command will give you an output like the one below.
GNU Mailman 3.3.3 (Tom Sawyer)
Python 3.9.2 (default, Feb 28 2021, 17:03:44)
[GCC 10.2.1 20210110]
config file: /etc/mailman3/mailman.cfg
db url: sqlite:////var/lib/mailman3/data/mailman.db
devmode: DISABLED
REST root url: http://localhost:8001/3.1/
REST credentials: restadmin:your_random_string_restpass
Step 6. Create Mailman admin
In this step, we are going to create an administrator or a super admin. This should be done by executing the shell command below.
# mailman-web createsuperuser
It will prompt you with the username and password you would like to create.
Username (leave blank to use 'www-data'): admin
Email address: [email protected]
Password:
Password (again):
Superuser created successfully.
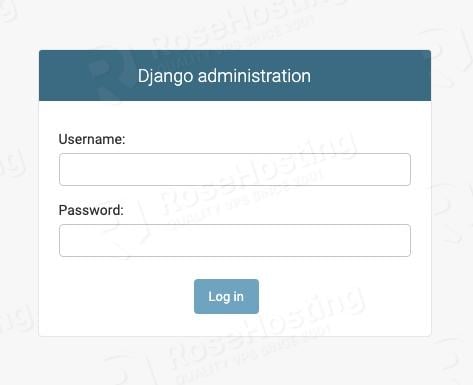
After creating an account, you can go to http://mailman3.yourdomain.com/mailman3/admin and log in using the username and password you created earlier. In this initial attempt, you will not be able to log in; mailman3 will instead send you a confirmation email that you need to approve first.

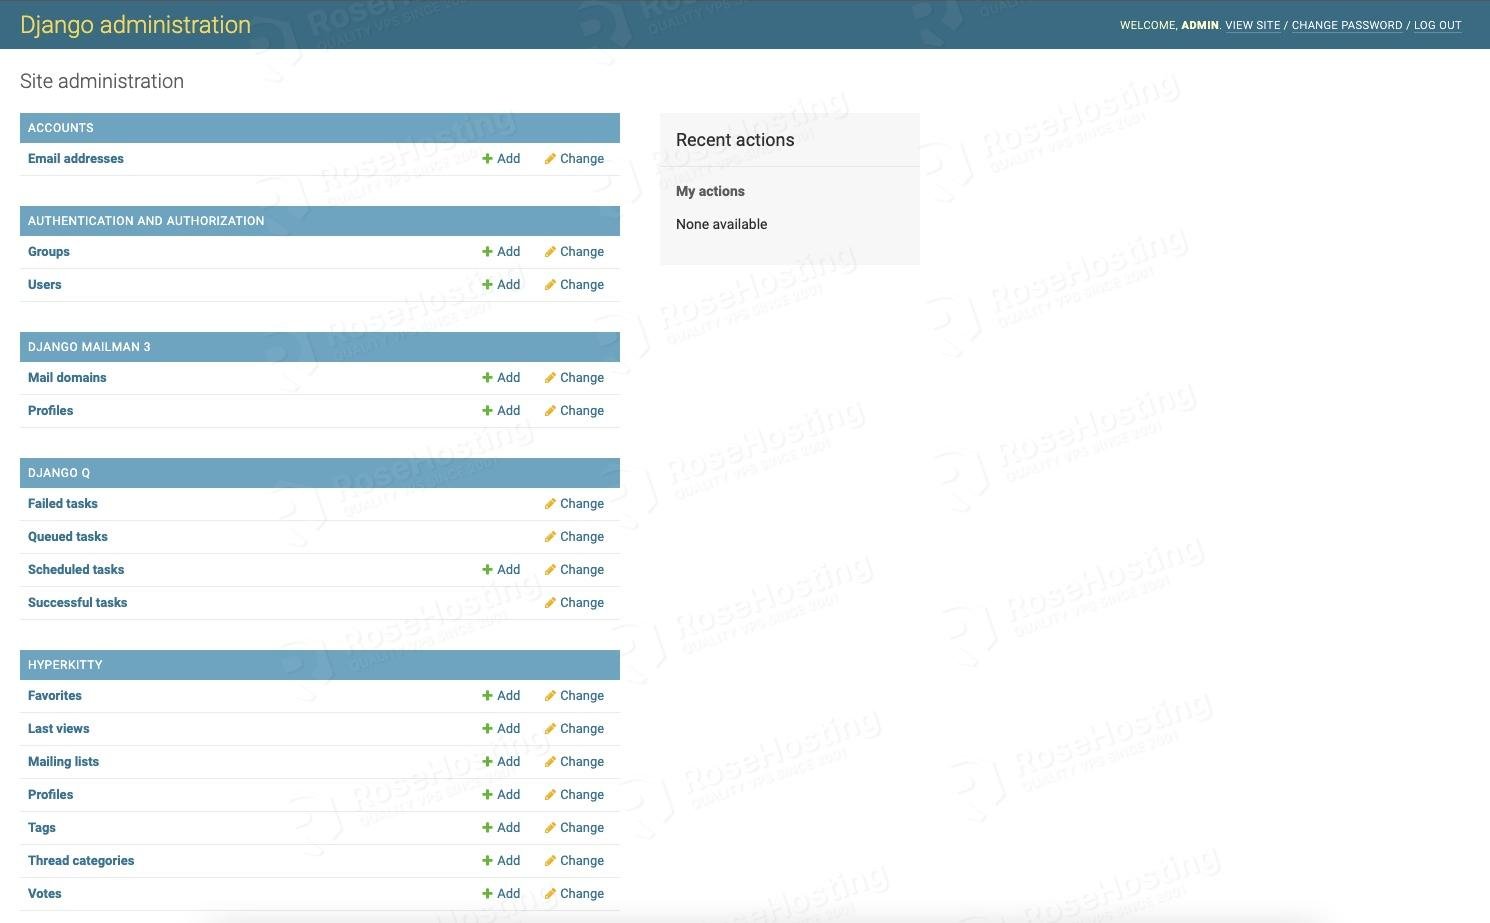
Once verified, you can log in
Then, you will be brought to the dashboard.
We’re confident that our post has simplified the process of installing Mailman3 on Debian 11. Now, we’d like to know your experience:
Do you think we’ve skipped an important point, or is there a step that needs more clarity?
What other subjects or guides are you interested in learning about through our platform?
We encourage you to share your thoughts by commenting below.
There are 2 points:
1) it is required to install the mysql interface of python to use mysql. The error message is unfortunately misleading:
apt install python3-mysqldb
if it is missing some config files in /etc/mailman3 are not created.
2) there is a bug in package libapache2-mod-proxy-uwsgi. It does not contain /etc/mods-available/proxy_uwsgi.* It is simply impossible to enable the module and access the web site. Simple create /etc/mods-available/proxy_uwsgi.load with content:
LoadModule proxy_uwsgi_module /usr/lib/apache2/modules/mod_proxy_uwsgi.so
Do this after apt install libapache2-mod-proxy-uwsgi.