
Redmine is a free and open-source project management tool and issue-tracking tool. It allows users and teams to plan, track, and manage their projects effectively. Redmine is a web application written using the Ruby on Rails framework.
It supports multiple database engines like MySQL/MariaDB, PostgreSQL, SQLite, and MSSQL.
In this tutorial, we will show you how to install Redmine on Ubuntu 22.04.
Prerequisites
- An Ubuntu 22.04 VPS
- SSH root access or a user with sudo privileges is required
Conventions
# – given commands should be executed with root privileges either directly as a root user or by use of sudo command
$ – given commands should be executed as a regular user
Step 1. Log in to your server via SSH
First, you will need to log in to your Ubuntu 22.04 VPS via SSH as the root user:
ssh root@IP_Address -p Port_number
You will need to replace ‘IP_Address’ and ‘Port_number’ with your server’s respective IP address and SSH port number. Additionally, replace ‘root’ with the username of the system user with sudo privileges.
You can check whether you have the proper Ubuntu 22.04 installed on your server with the following command:
# lsb_release -a
It will return an output like this.
No LSB modules are available.<br>Distributor ID: Ubuntu<br>Description: Ubuntu 22.04 LTS<br>Release: 22.04<br>Codename: jammy
Then, run the following command to make sure that all installed packages on the server are updated to their latest available versions:
# apt update
In this article, some commands are executed by ‘root’ user and some by another user.
Step 2. Install Dependencies
We need to install the required build tools to be able to proceed with installing Redmine from the source code.
# apt install build-essential ruby-dev libxslt1-dev libmariadb-dev gnupg2 bison libbison-dev libgdbm-dev libncurses-dev libncurses5-dev libxml2-dev zlib1g-dev imagemagick libmagickwand-dev libreadline-dev libssl-dev libyaml-dev libsqlite3-dev sqlite3
Step 3. Add System User
In this step, we will create a new system user called ‘redmine’; we will use this user to run Redmine-related commands.
# useradd -r -m -d /opt/redmine -s /bin/bash redmine
The command above will create user ‘redmine’ with /opt/redmine as its home directory, and it should have permission to run shell commands. We also need to add our web server user (www-data) to our redmine group.
# usermod -aG redmine www-data
Step 4. Install Nginx and Passenger
In this step, we are going to install nginx from the Ubuntu repository.
# apt install nginx
Then, let’s install Passenger packages.
# apt install -y dirmngr gnupg apt-transport-https ca-certificates curl
# curl https://oss-binaries.phusionpassenger.com/auto-software-signing-gpg-key.txt | gpg --dearmor | tee /etc/apt/trusted.gpg.d/phusion.gpg >/dev/null
# sh -c 'echo deb https://oss-binaries.phusionpassenger.com/apt/passenger jammy main > /etc/apt/sources.list.d/passenger.list'
# apt update
# apt install libnginx-mod-http-passenger -y
The passenger nginx module should be installed now; let’s restart nginx.
# systemctl restart nginx
Now, we can create an nginx server block for our Redmine website.
# nano /etc/nginx/conf.d/redmine.yourdomain.com.conf
Insert the following into the file above. But make sure to change the server name to your actual domain or subdomain name.
server {<br>listen 80;<br>server_name redmine.yourdomain.com;<br><br>root /opt/redmine/public;<br><br>access_log /var/log/nginx/your_domain.com.access.log;<br>error_log /var/log/nginx/your_domain.com.error.log;<br>passenger_enabled on;<br>passenger_min_instances 1;<br>client_max_body_size 10m;<br><br>}
Save the file, then exit and restart nginx to apply the new configuration.
# systemctl restart nginx
Step 5. Install MariaDB and Create a Database
In this step, we are going to install the MariaDB server from the default Ubuntu repository. To install the MariaDB server, execute this command below:
# apt install mariadb-server
Upon MariaDB installation on an Ubuntu system, the MariaDB server will be automatically running. So now, we can proceed with creating a new database and database user for our Redmine website.
# mysql
Once logged in to MySQL shell, we can run the following commands.
mysql> CREATE DATABASE redminedb;<br>mysql> GRANT ALL on redminedb.* to redmineuser@localhost identified by 'm0d1fyth15';<br>mysql> FLUSH PRIVILEGES;<br>mysql> \q
Make sure to create a stronger database password; replace m0d1fyth15 in the command above with a stronger one.
Step 6. Install Redmine
We will install the latest stable version of Redmine. You can go to their download page to check the latest version available.
Let’s download version 5.0.5 and extract it under directory /opt/redmine
# wget https://www.redmine.org/releases/redmine-5.0.5.tar.gz
# tar -xzvf redmine-5.0.5.tar.gz -C /opt/redmine/ --strip-components=1
# chown -R redmine. /opt/redmine/
Next, let’s switch to user ‘redmine’.
# su - redmine
Let’s copy the example configuration files
$ cp -a /opt/redmine/config/configuration.yml{.example,}
$ cp -a /opt/redmine/config/database.yml{.example,}
$ cp -a /opt/redmine/public/dispatch.fcgi{.example,}
Then, we need to edit the database configuration file; let’s use the database credentials we created in the previous step.
$ nano /opt/redmine/config/database.yml
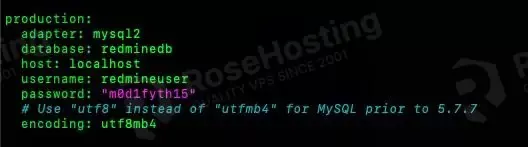
Make sure to use the correct credentials.
$ exit
As user ‘root’, let’s run this command
# cd /opt/redmine && gem install bundler
And let’s switch back to user ‘redmine’
# su - redmine
Proceed with the installation
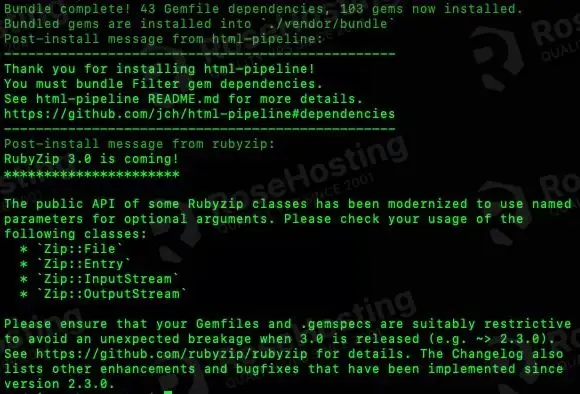
$ bundle config set --local path 'vendor/bundle'<br>$ bundle install<br>$ bundle update
Once completed, it will show you an output similar to this:
Execute these two commands below to generate the keys and migrate the database:
$ bundle exec rake generate_secret_token<br>$ RAILS_ENV=production bundle exec rake db:migrate
Once the database migration is done, we can insert default configuration data into the database:
$ RAILS_ENV=production REDMINE_LANG=en bundle exec rake redmine:load_default_data
$ exit
Let’s update gem now.
# gem update
The command above will take some time to complete
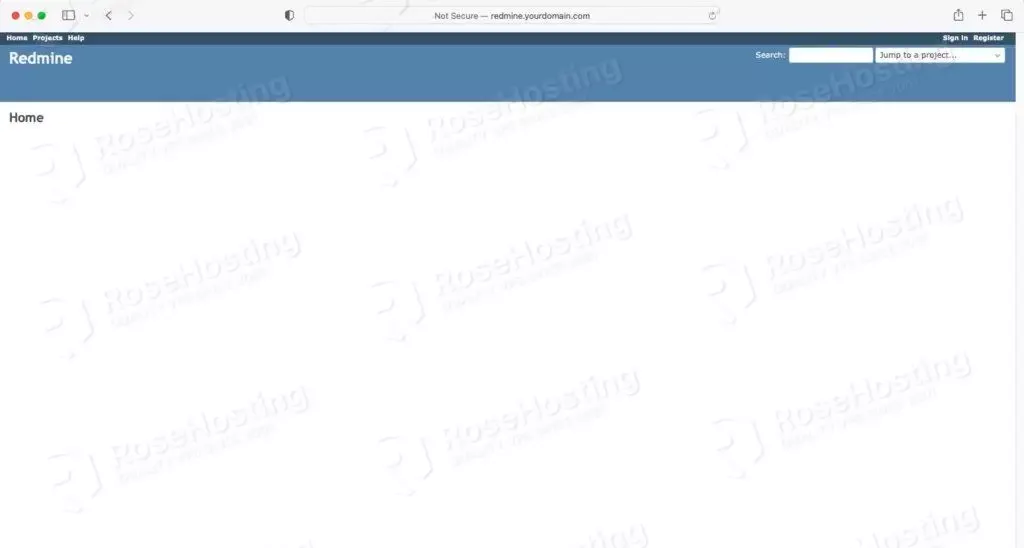
Once completed, you can navigate to redmine.yourdomain.com and log in using the default login credentials for Redmine are:
Username: admin
Password: admin
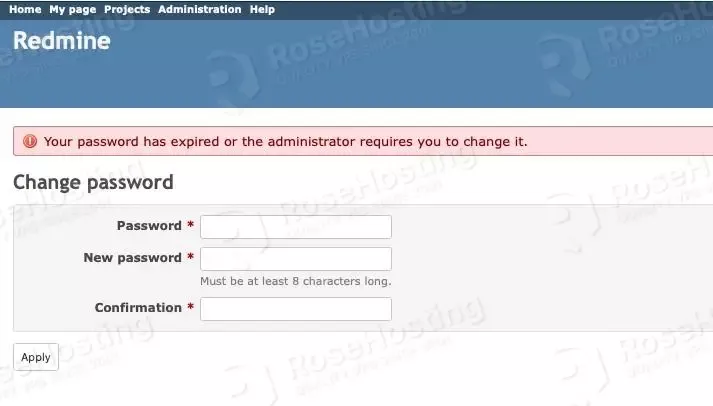
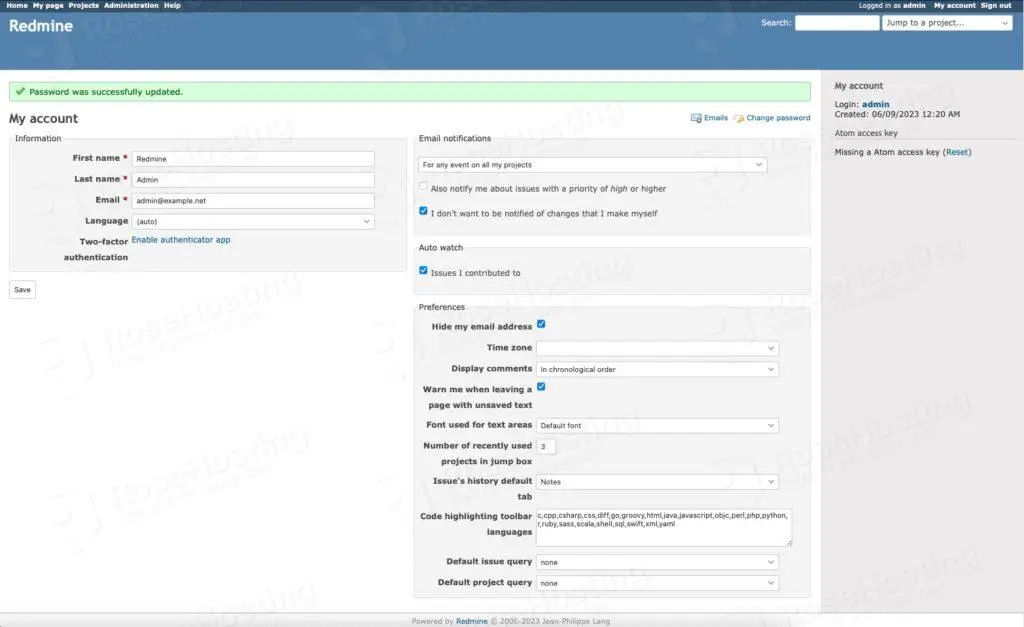
After logging in, you will be forced to create a stronger password.
Then, you can start working on your Redmine website.
We hope that our step-by-step guide on installing Redmine on Ubuntu 22.04 has made the process much clearer and easier for you. Now, we’d love to hear from you:
Do you have any concerns about the steps or need more detailed information? Can you suggest other areas of interest or step-by-step tutorials that you would like us to explore in our future posts?
We’d appreciate your feedback in the comments below.
thanks
Thanks for details. I have got the success installation at first.
But, When I tried to install on new Ubunto 22.04 and same way, I got the failure such as below logs.
So, If you never mind, Can you please give me a tip or guide for solving this case?
Actually, I have tried twice on new server, but same result.. Plz… 🙁
————————————————–
Error ID:
bae41349
Details:
Web application could not be started by the Phusion Passenger(R) application server.
Please read the Passenger log file (search for the Error ID) to find the details of the error.
You can also get a detailed report to appear directly on this page, but for security reasons it is only provided if Phusion Passenger(R) is run with environment set to development and/or with the friendly error pages option set to on.
For more information about configuring environment and friendly error pages, see:
Please make sure to install the prerequisites before proceeding with the Redmine installation.