Communication is one of the most important pillars of every company. There are solutions for business needs or for corporate use, such as Rocket.Chat, Slack, Hangouts, Flock, as well as messengers for everyday communication, such as Skype, WhatsApp, Telegram, and others.

Currently, Rocket.Chat is one of the most popular and widely used team communication apps available. How can you set things up and start using this tool for your team? In this article, we will deploy Rocket.Chat server in a Cloud PaaS environment. You’ll set up a custom domain, and we’ll secure our application with an SSL certificate.
Prerequisites
- You should have at least $1 on our Cloud PaaS platform in order to access the dashboard.
Deploying Rocket.Chat instance
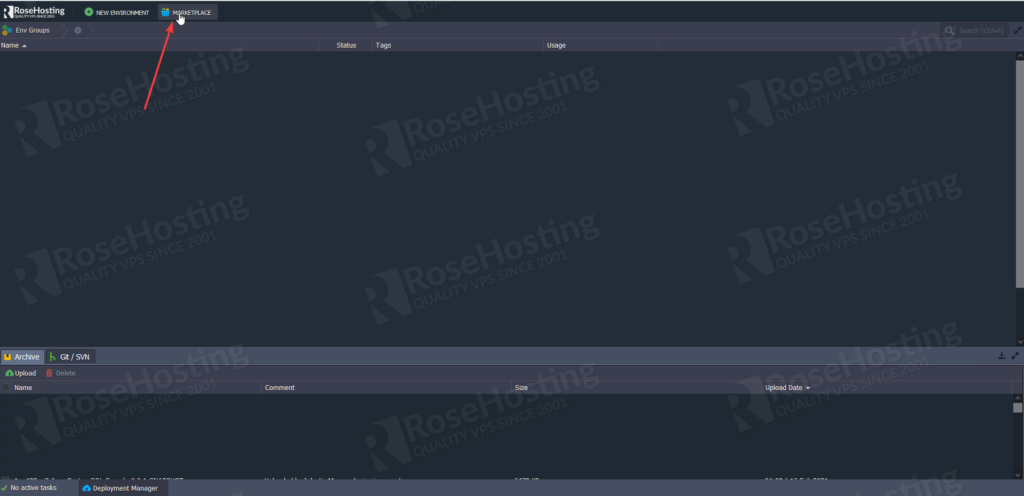
Once we access our dashboard, we need to reach the Marketplace button on the top bar.
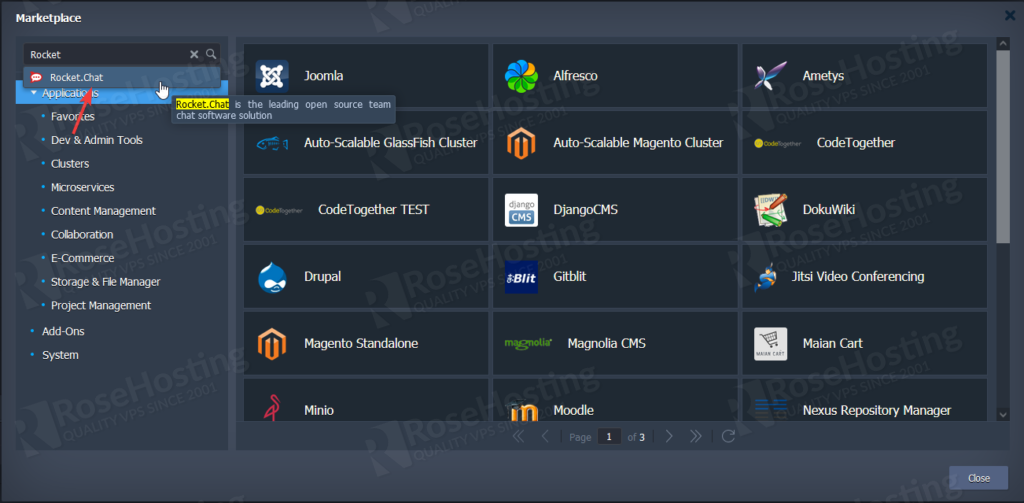
Then we’ll search for Rocket.Chat and will hit Install.
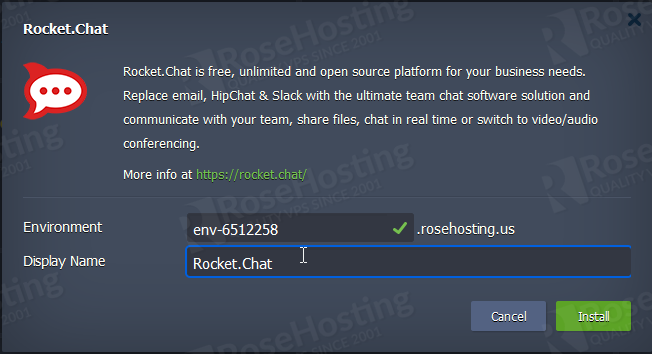
You can change the display name to whatever you want or can leave the default one. The environment name can be changed as well.
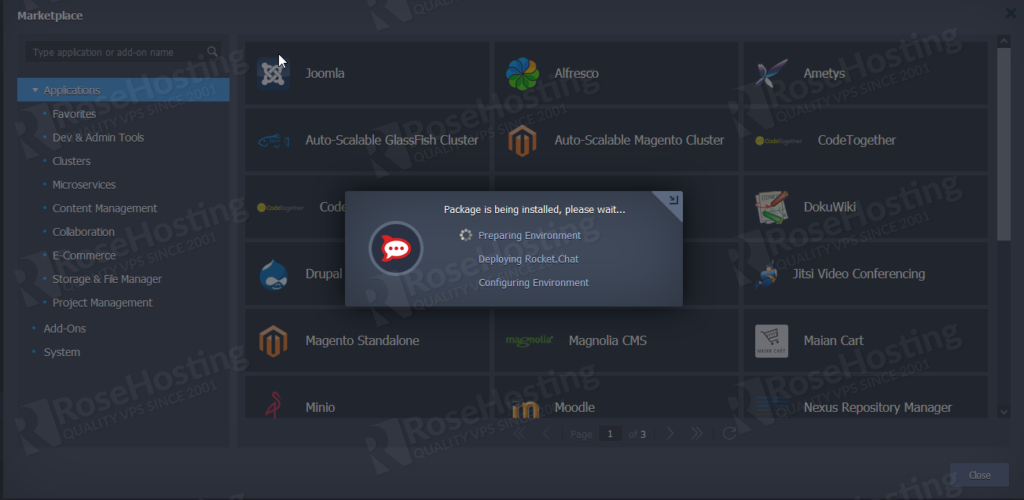
After you hit Install, a new pop up will appear showing the deployment process:
Then, after the deployment is finished, your instance is already up and running. You can access it now from the Environment Link. But, this environment link is not so professional. So now, we’ll add a custom domain to our instance.
Bind custom domain
In order to access the instance with a custom domain name, you need to go to the “Settings” option:
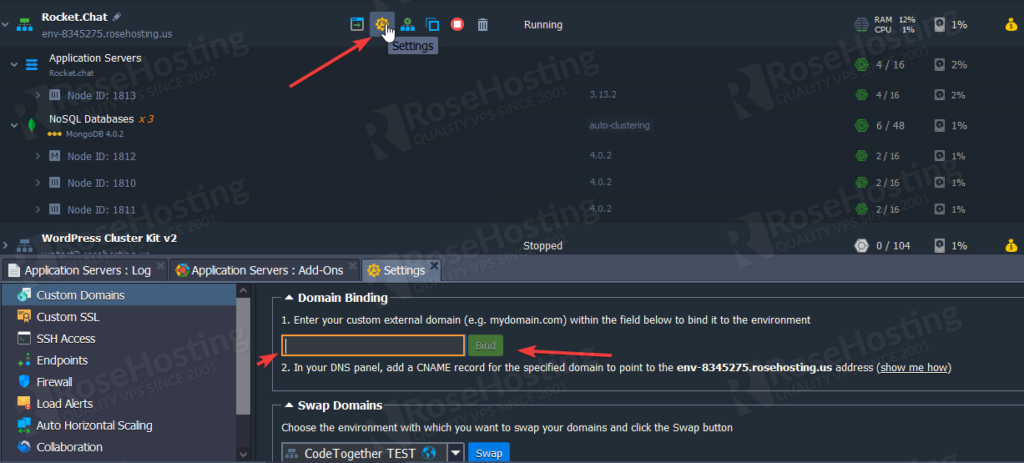
And you are done. The domain is now set on your instance and you need to point your domain to the CNAME record as it shows on the second step on Domain Binding.
We need now to deploy a valid SSL certificate to our instance.
Installing a SSL certificate on your instance
For that, we’ll need to change the environment topology and add a load balancer to the web server to install the SSL, as shown below:

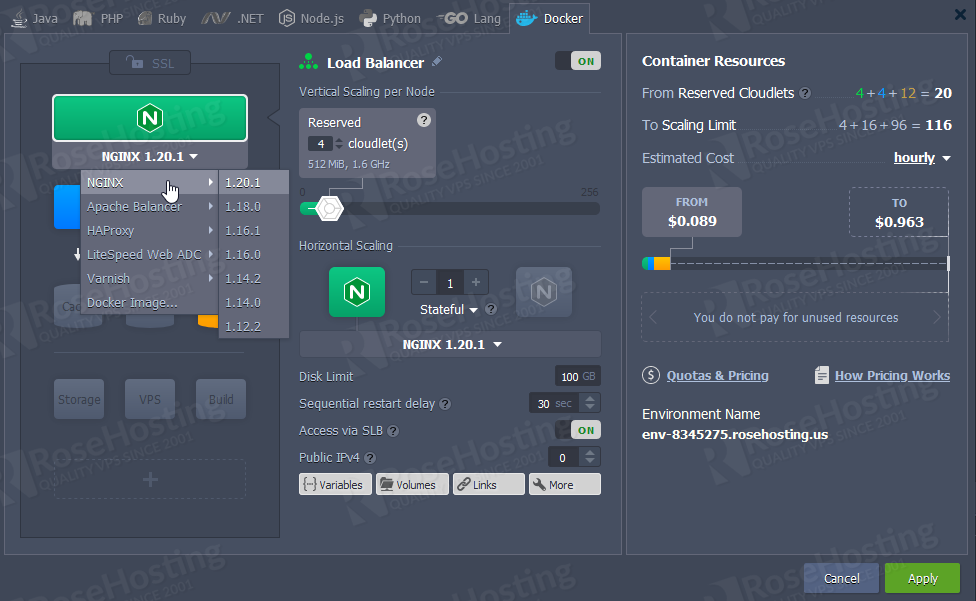
After selecting the desired Nginx version, you just hit apply to make the changes to your environment. Now the Nginx is configured on our instance, we need to access the addons from Nginx:
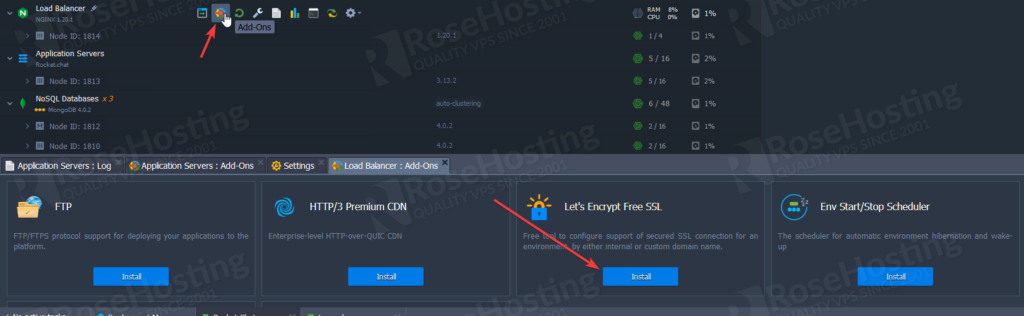
A new screen will pop up, you need to fill the domain that was bound on the last topic.
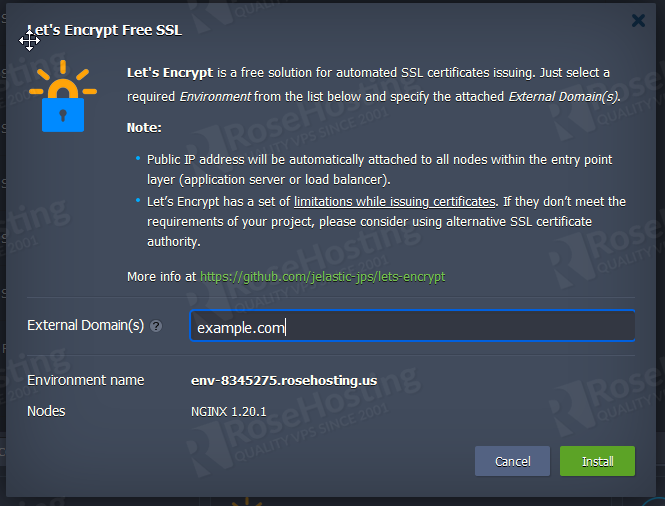
You need now just to hit Install and the SSL will be deployed to your instance. (Note that your domain needs to be already pointed and propagated to the environment.)
When the SSL installation finishes, you can access your custom domain using the SSL certificate and proceed with the finish of your instance:

And we are done, you have successfully deployed your Rocket.Chat instance with your custom domain and a valid SSL certificate. You can now start to communicate through Rocket Chat and sharing the custom domain with your teammates or friends.