XWiki is a free and open-source wiki platform software written in Java. It was initially released in 2003 under an LGPL license. XWiki runs on a servlet container like Tomcat, JBoss, Jetty, etc. It enables you to deploy a simple web platform. In this tutorial, we will show you how to install XWiki on AlmaLinux 9.
Prerequisite
- an AlmaLinux 9 server
- root access enabled or a regular user with sudo privileges
Conventions
# – given commands should be executed with root privileges either directly as a root user or by use of sudo command
$ – given commands should be executed as a regular user
Step 1: Log in to your server via SSH
First, you will need to log in to your AlmaLinux 9 VPS via SSH as the root user:
# ssh root@IP_Address -p Port_number
You will need to replace ‘IP_Address’ and ‘Port_number’ with your server’s respective IP address and SSH port number. Additionally, replace ‘root’ with the username of the system user with sudo privileges.
You can check whether you have the proper AlmaLinux version installed on your server with the following command:
# cat /etc/almalinux-release
It will return an output like this:
AlmaLinux release 9.1 (Lime Lynx)
Step 2: Update the system
Before starting, you have to make sure that all AlmaLinux OS packages installed on the server are up to date. You can do this by running the following commands:
# dnf update
# dnf upgrade
Step 3. Install Java
We can install Java from the default repository; let’s execute this command:
# dnf install java
To verify, we can check the Java version. Run this command:
# java -version
It will return an output like this:
openjdk version "11.0.18" 2023-01-17 LTS
OpenJDK Runtime Environment (Red_Hat-11.0.18.0.10-2.el9_1) (build 11.0.18+10-LTS)
OpenJDK 64-Bit Server VM (Red_Hat-11.0.18.0.10-2.el9_1) (build 11.0.18+10-LTS, mixed mode, sharing)
Step 4. Install Tomcat
Tomcat 10 is not recommended at the moment to run XWiki, and Tomcat 9 also has some bugs. So we are going to install Tomcat 8 in this step. Tomcat will be installed under a new system user called ‘tomcat’. Let’s create this user first.
# groupadd tomcat
# useradd -g tomcat -d /opt/tomcat tomcat
Now, we can switch to Tomcat users to proceed with downloading and installing Tomcat.
# su - tomcat
You can check the latest released Tomcat 8 at their download page, then right-click the .tar.gz file and copy the link
$ wget https://dlcdn.apache.org/tomcat/tomcat-8/v8.5.87/bin/apache-tomcat-8.5.87.tar.gz -O tomcat8.tar.gz
Once downloaded, we can extract it and exit.
$ tar -xzvf tomcat8.tar.gz --strip-components=1
$ exit
That’s it; Tomcat files are extracted in /opt/tomcat directory. The next step is to create a Tomcat systemd file.
# nano /etc/systemd/system/tomcat8.service
Copy and paste the following in to that file
[Unit]
Description=Apache Tomcat 8 Service
After=syslog.target network.target

[Service]
Type=forking

User=tomcat
Group=tomcat

Environment=JAVA_HOME=/usr/lib/jvm/jre
Environment=CATALINA_PID=/opt/tomcat/temp/tomcat.pid
Environment=CATALINA_HOME=/opt/tomcat
Environment=CATALINA_BASE=/opt/tomcat
Environment='CATALINA_OPTS=-Xms512M -Xmx1024M -XX:MaxPermSize=192m -server -XX:+UseParallelGC'
Environment='JAVA_OPTS=-Djava.awt.headless=true -Djava.security.egd=file:/dev/./urandom'

ExecStart=/opt/tomcat/bin/startup.sh
ExecStop=/bin/kill -15 $MAINPID

[Install]
WantedBy=multi-user.target
Save the file, then exit.
It is time to reload systemd and run Tomcat
# systemctl daemon-reload
# systemctl enable --now tomcat8
Step 5. Install MariaDB Server and Create a Database
MariaDB server is available in the default repository, so we can install it easily.
# dnf install mariadb-server
MySQL is installed, and we will run it and enable it on boot.
# systemctl enable --now mariadb
MySQL is running now, and we can create a user and database. Since we didn’t create a password for the MySQL root user, we can execute these commands below to create a database and user and give it the privileges.
mysql -e "create database xwiki default character set utf8mb4 collate utf8mb4_bin"
mysql -e "CREATE USER 'xwiki'@'localhost' IDENTIFIED BY 'm0d1fyth15'";
mysql -e "grant all privileges on *.* to xwiki@localhost"
Step 6. Download XWiki
To get the more recent version, you can check their download page at https://www.xwiki.org/xwiki/bin/view/Download/. When writing this article, the latest stable version is 15.2 so we are going to download and install that version.
# su - tomcat
Now, download and move it to webapps directory
$ wget https://nexus.xwiki.org/nexus/content/groups/public/org/xwiki/platform/xwiki-platform-distribution-war/15.2/xwiki-platform-distribution-war-15.2.war -O xwiki.war
$ mv xwiki.war /opt/tomcat/webapps/
Step 7. Download MariaDB Connector
Since we are using MariaDB, so we need to download its Java connector. Do not confuse this with MySQL Java connector.
$ wget https://dlm.mariadb.com/2896669/Connectors/java/connector-java-3.1.3/mariadb-java-client-3.1.3.jar
$ mv mariadb-java-client-3.1.3.jar webapps/xwiki/WEB-INF/lib/
$ exit
You can check the more recent version of the MariaDB connector.
Now, we need to configure XWiki to use MariaDB as the database server. To do this, we need to disable the default database and enable MariaDB.
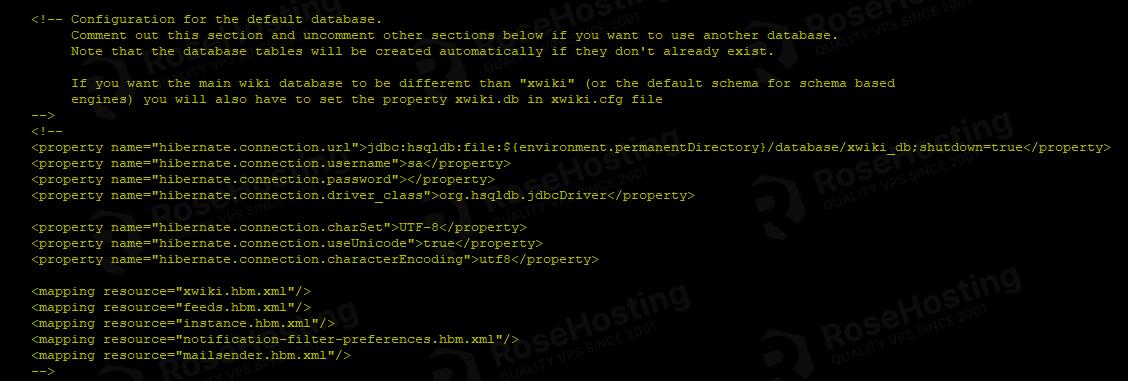
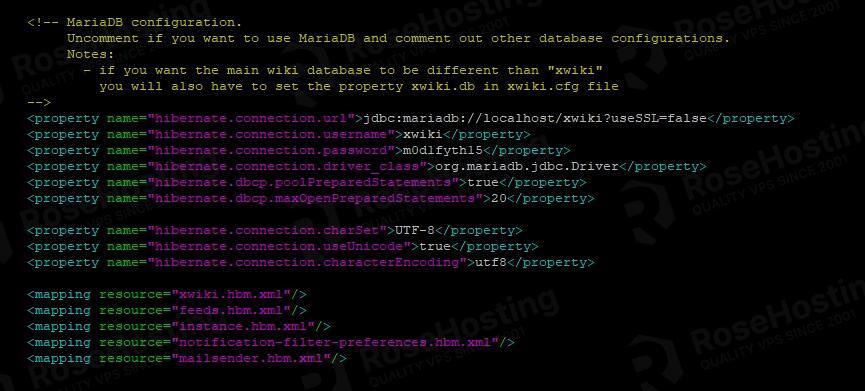
# nano /opt/tomcat/webapps/xwiki/WEB-INF/hibernate.cfg.xml
Comment out the default hsqldb database section and uncomment and edit the MariaDB database section as shown below:
Now, let’s restart Tomcat and go to http://YOUR_IP_ADDRESS:8080/xwiki, and you should see that XWiki is initializing.
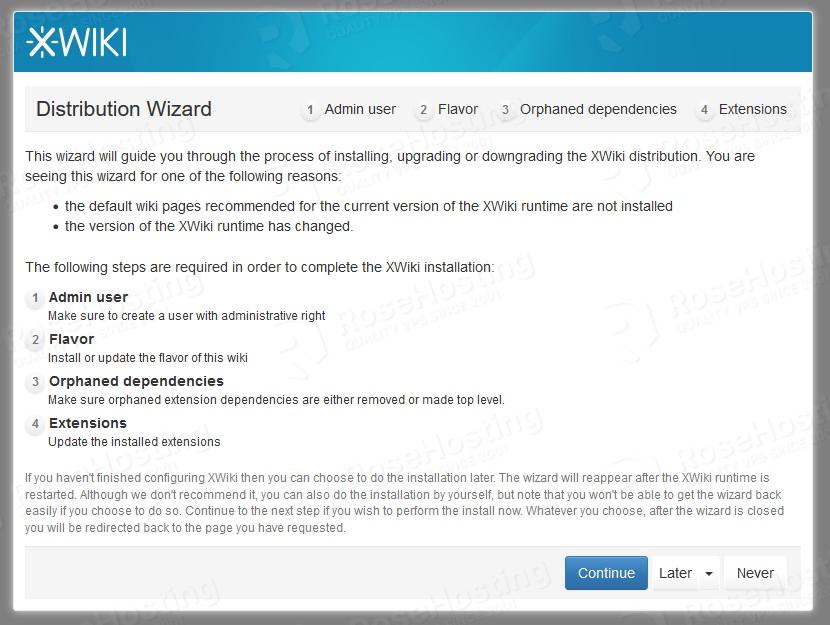
Click Continue to proceed.
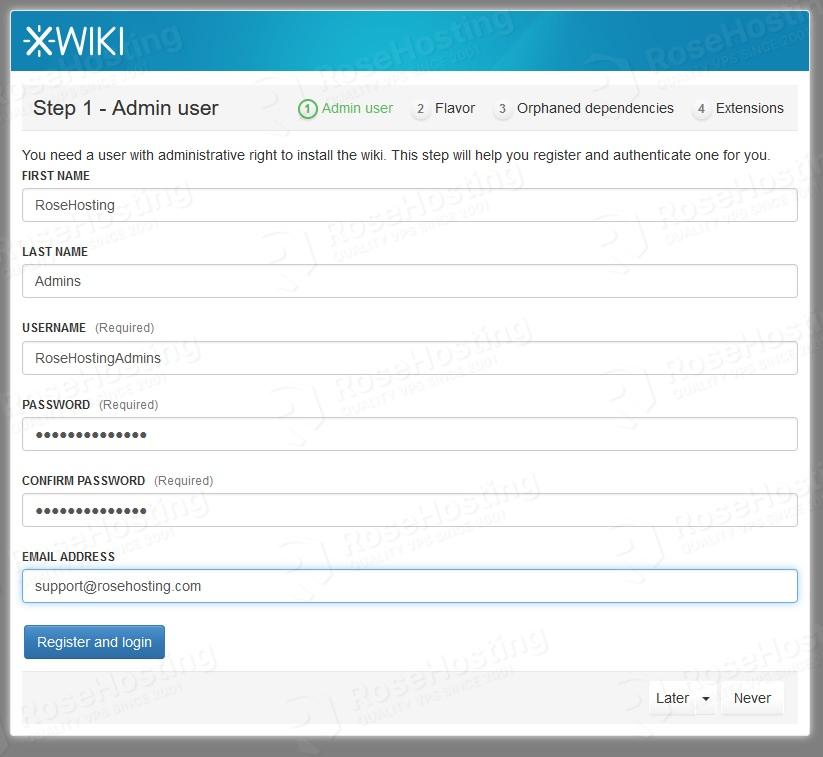
Click on Register and Login

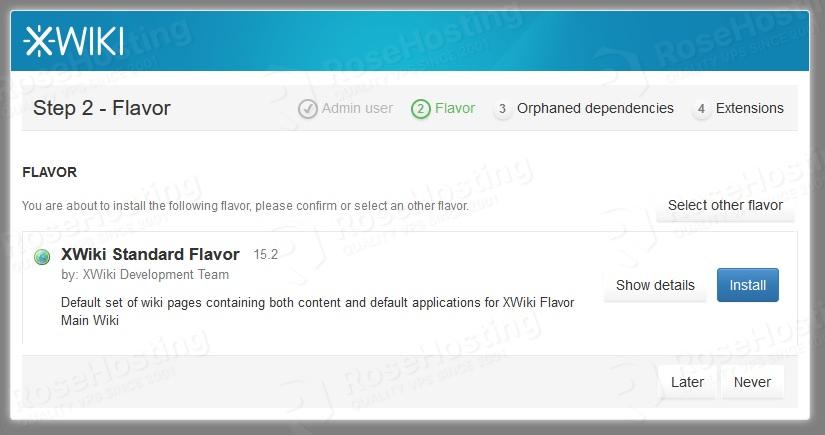
Click on the Continue button
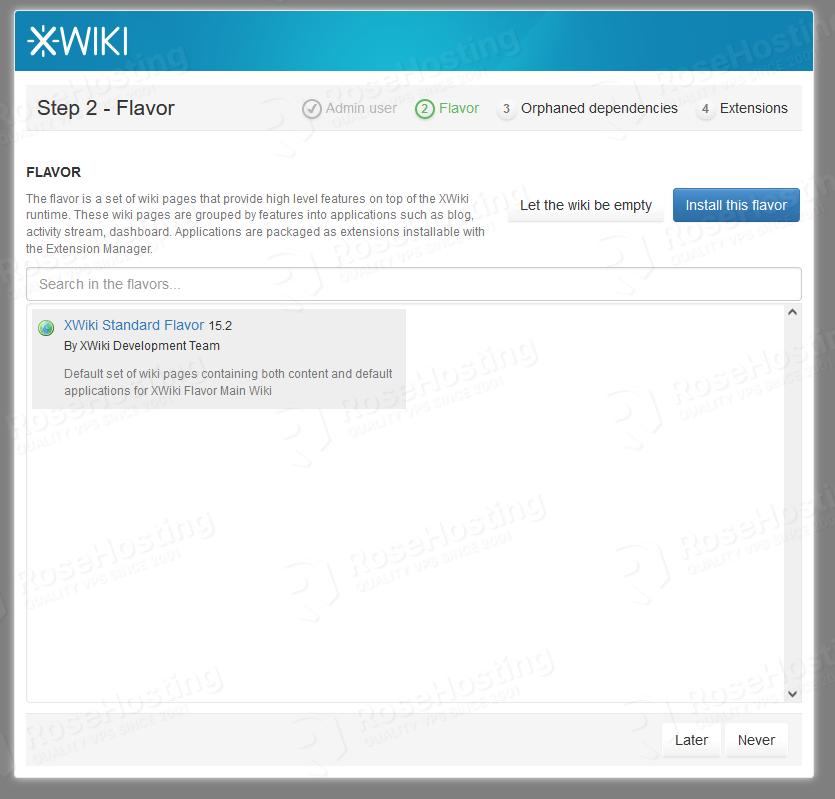
Click on the existing flavor then click ‘Install this flavor’
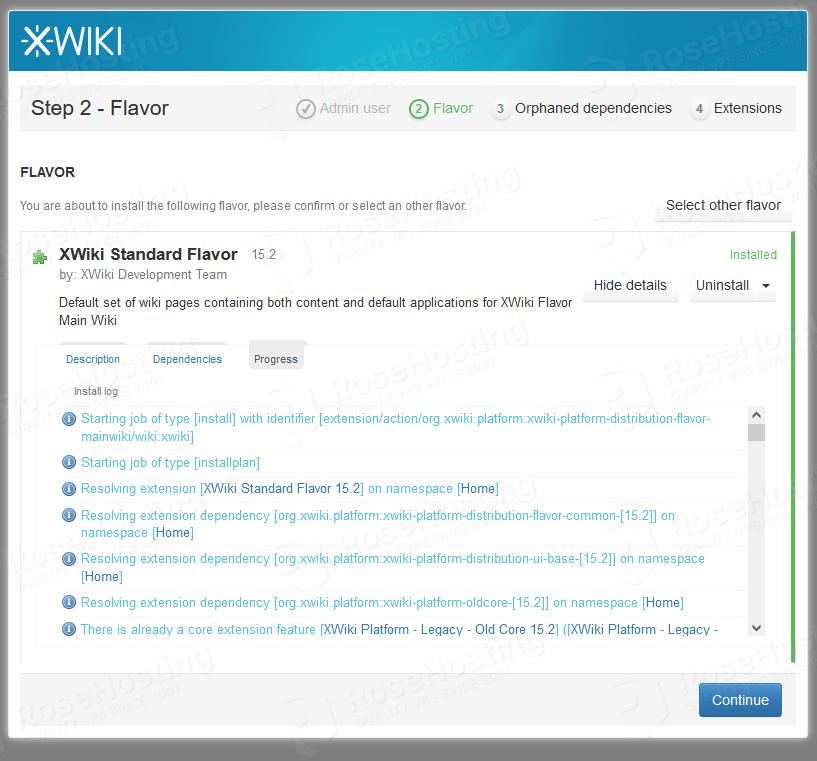
Click on Install and once finished click Continue
Click Continue
Click the Continue button.
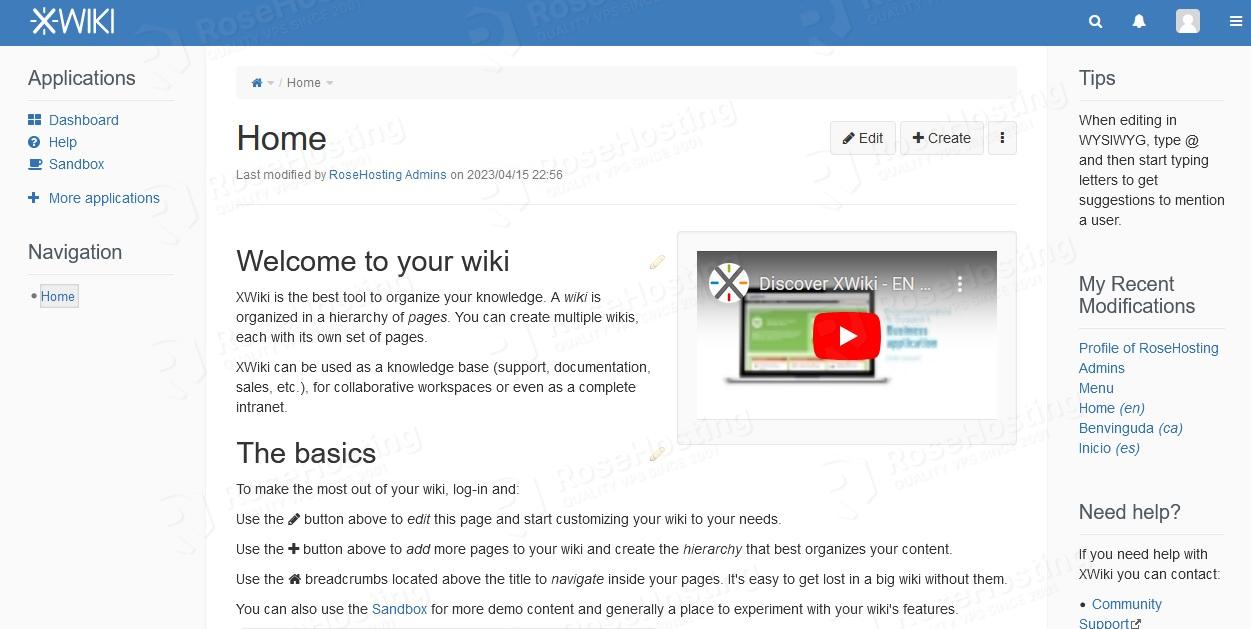
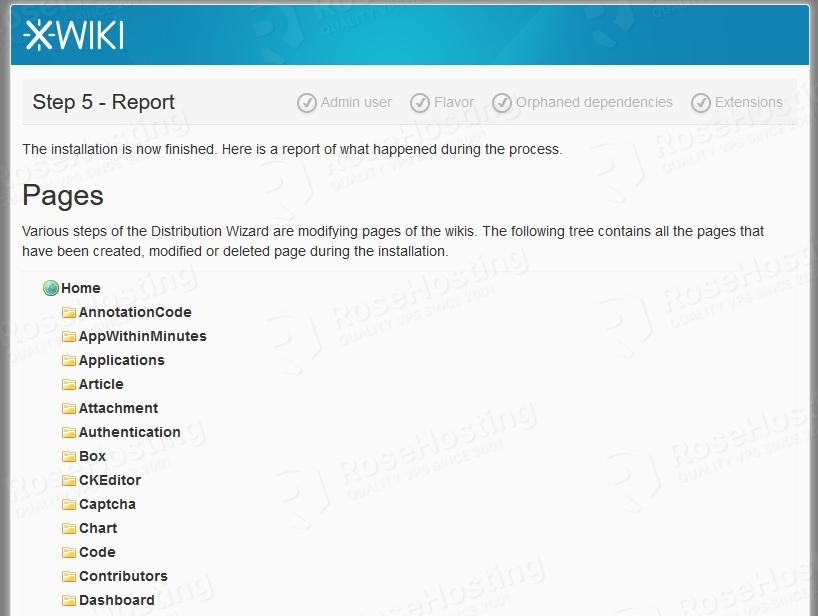
That’s it, XWiki installation has been completed.
Step 8. Install and Configure Nginx
In this step, you are able to access your XWiki installation at http://YOUR_IP_ADDRESS:/8080/xwiki. If you want to access your XWiki installation using a domain or subdomain, we need to install a webserver and configure it.
# dnf install nginx
Let’s create a new nginx server block for your domain.
# nano /etc/nginx/conf.d/xwiki.conf
Paste the lines below into the configuration file.
map $request_uri $expires {
default off;
~*\.(ogg|ogv|svg|svgz|eot|otf|woff|mp4|ttf|rss|atom|js|jpg|jpeg|gif|png|ico|zip|tgz|gz|rar|bz2|doc|xls|exe|ppt|tar|mid|midi|wav|bmp|rtf)(\?|$) 1h;
~*\.(css) 0m;
}

expires $expires;

server {
listen 80;
server_name yourdomain.com;
charset utf-8;

root /var/www/html;

location /.well-known {
alias /var/www/html;
}

location / {
rewrite ^ $scheme://$server_name/xwiki$request_uri? permanent;
}

location ^~ /xwiki {
proxy_pass http://localhost:8080;
proxy_cache off;
proxy_set_header X-Real-IP $remote_addr;
proxy_set_header X-Forwarded-For $proxy_add_x_forwarded_for;
proxy_set_header Host $http_host;
proxy_set_header X-Forwarded-Proto $scheme;
expires $expires;
}
}
Exit the file, but before you do that, make sure to replace yourdomain.com with your actual domain or subdomain name. Finally, restart nginx to apply the new nginx server block.
# systemctl restart nginx
We hope that our step-by-step guide on installing XWiki on AlmaLinux 9 has made the process much clearer and easier for you. Now, we’d love to hear from you:
Do you have any concerns about the steps or need more detailed information?
Could you share any unique topics or tutorial requests you’d like us to consider for our upcoming posts?
We’d appreciate your feedback in the comments below.