TomatoCart is a free and open source shopping cart solution licensed under the terms of the Open Source GPL 3.0 license. It is designed to provide excellent user experience for all digital devices such as desktop computers, tablets, phones etc. TomatoCart is very easy to install and setup on a Linux Cloud VPS and in this tutorial we are going to show you how to do that on Ubuntu 14.04.
The system requirements for TomatoCart V1.x are the following:
- PHP 5.3 + (with MySQLi extension installed and enabled)
- MySQL 5.0.7 +
- Apache 2.x + (with mod_mysql, mod_xml, and mod_zlib installed and enabled)
Once you have your virtual server set up with support for these requirements, you can go ahead and continue with the other steps of this tutorial to download and install TomatoCart on your server. Please note, our Ubuntu Cloud VPS hosting plans come with a pre-configured LAMP server.
First of all, connect to your server via SSH and update all your software to the latest version available. You can do that using the following command:
sudo apt-get update && sudo apt-get -y upgrade
The update process should take few minutes. Then, navigate to the /var/www/ directory on your server:
cd /var/www/
Download the latest version of the software. At the moment of writing this tutorial, the latest stable release of TomatoCart is V1.1.8.6.1. Therefore, to download TomatoCart V1.1.8.6.1 you can use the command below:
sudo wget http://sourceforge.net/projects/tomatocart/files/TomatoCart-1.1.8.6.1.zip
Unzip the package and rename the directory to something more simple:
sudo unzip TomatoCart-1.1.8.6.1.zip
sudo mv TomatoCart-v* tomatocart
Change the ownership of the files and set the web server to be the owner:
sudo chown www-data: -R tomatocart/
The next thing you need to do is to create an Apache virtual host for TomatoCart:
sudo nano /etc/apache2/sites-available/tomatocart.conf
Add the following content:
<VirtualHost *:80>
 ServerAdmin [email protected]
 DocumentRoot /var/www/tomatocart
 ServerName yourdomain.com
 ServerAlias www.yourdomain.com
 <Directory /var/www/tomatocart/>
Options Indexes FollowSymLinks MultiViews
AllowOverride All
Order allow,deny
allow from all
 </Directory>
 ErrorLog /var/log/httpd/yourdomain.com-error_log
 CustomLog /var/log/httpd/yourdomain.com-access_log common
</VirtualHost>
Save the file you created and close it using CTRL + X, Y and Enter/Return. Enable the configuration for TomatoCart and restart the Apache web server:
sudo a2ensite tomatocart
sudo service apache2 restart
Since TomatoCart stores its data into a MySQL database, you need to create a database for it. Log into MySQL as root:
mysql -u root -p
Create a new database for TomatoCart, a TomatoCart database user and set up a password using the commands below:
mysql> CREATE DATABASE tomatocartDB;
mysql> GRANT ALL PRIVILEGES ON tomatocartDB.* TO 'tomatocart'@'localhost' IDENTIFIED BY 'YoUrPaSsWoRd';
mysql> FLUSH PRIVILEGES;
mysql> \q
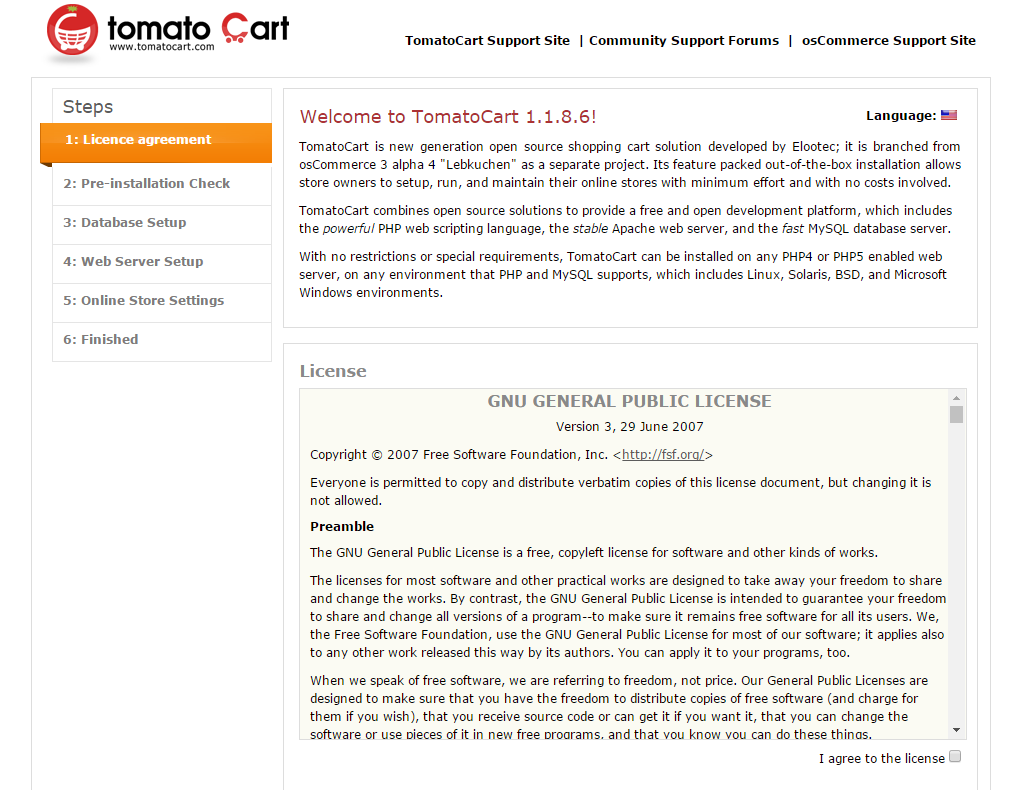
The final step is to open your favorite web browser and enter your domain name into the search bar. You should see something like the image below:
This is the TomatoCart welcome screen. Here you need to accept the license and continue with the online instructions to complete the TomatoCart installation. To set up an effective online store step by step, you can check the user guide on TomatoCart’s official website.
Of course you don’t have to do any of this if you use one of our Linux Cloud VPS hosting services, in which case you can simply ask our expert Linux admins to install TomatoCart for you. They are available 24×7 and will take care of your request immediately.
PS. If you liked this post please share it with your friends on the social networks using the buttons on the left or simply leave a reply below. Thanks.

