CyberPanel is an open-source web hosting control panel. It lets you manage websites, domains, databases, email, DNS, FTP, SSL, and other web hosting features. CyberPanel was created to provide a fast, easy web hosting solution that helps users save time and resources when managing servers and websites. CyberPanel offers a simple, user-friendly interface, making it suitable for beginners and experienced users alike. The control panel also includes advanced features, such as support for the latest web technologies like LiteSpeed Web Server, HTTP/3, and QUIC. In this article, we will show you how to install CyberPanel on Ubuntu 26.04 with OpenLiteSpeed and Redis Object Cache.
CyberPanel is available in two versions: CyberPanel Enterprise and CyberPanel Core. CyberPanel Enterprise is a paid version for businesses and enterprises that need technical support and specialized features, while CyberPanel Core is a free version anyone can download and use.
Prerequisites
- An Ubuntu 26.04 server
- SSH root access or a regular system user with sudo privileges
Conventions
# – given commands should be executed with root privileges either directly as a root user or by use of sudo command
$ – given commands should be executed as a regular user
Step 1. Update the System
Let’s log in to your Ubuntu 26.04 VPS through SSH as a root user or as a regular user with sudo privileges.
ssh root@IP_Address -p Port_numberIf you cannot log in as root, remember to substitute “root” with a user that has sudo privileges. Additionally, change “IP_Address” and “Port_Number” make sure it matches your server’s respective IP address and SSH port.
You can check whether you have the correct Ubuntu version installed on your server with the following command:
# lsb_release -aYou should get this output:
No LSB modules are available.
Distributor ID: Ubuntu
Description:    Ubuntu 26.04
Release:    26.04
Codename:   resolute
That’s it, the system package information should be updated now.
Step 2. Install Dependencies
Almost every package we install relies on other packages to run properly or to enable to install. Before proceeding with the other steps, we need to install the dependencies.
# apt install wget curl swig autoconf automake libtool pkg-config gcc g++ make net-tools -yStep 3. Run Installation Script
There is no other way to install Cyberpanel. Let’s download and then execute the installer script by running the single line command below.
# sh <(curl https://cyberpanel.net/install.sh || wget -O - https://cyberpanel.net/install.sh)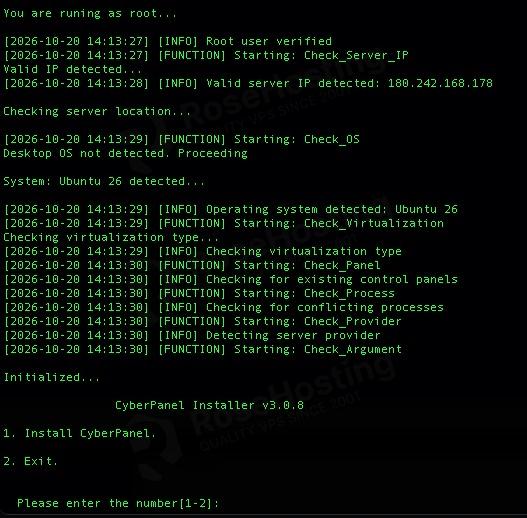
We need to press 1 and hit ENTER to proceed with the installation.
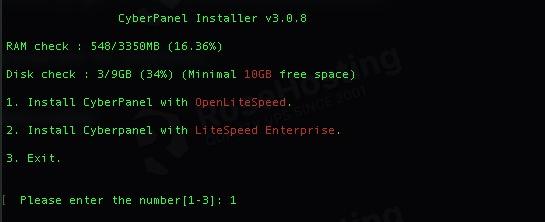
Now, let’s select 1 again to choose OpenLiteSpeed

In this step, let’s choose everything to install; press Y

When asked to choose remote MySQL, select NO, then hit ENTER twice to select the latest MySQL version.

In this step, avoid using default passwords. It is recommended to create a strong password or use a randomly generated password. Then, select YES when asked about Memcached (A distributed, in-memory object caching system) and Redis (Data structure storage in memory, acting as a database, cache, and message broker) installation.
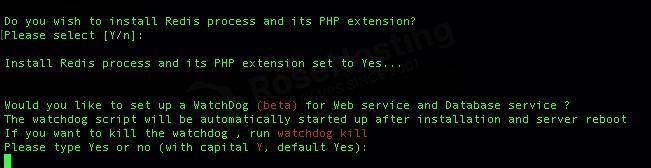
Just hit ENTER to install watchdog. Now, the script will do the installation; we just need to wait.
Step 3. Installation Complete
Once the installation process is complete, a screen will appear containing important information such as the access URL, username, and password. Keep this information in a secure place for future reference.
###################################################################
                CyberPanel Successfully Installed

                Current Disk usage : 11/18GB (62%)

                Current RAM  usage : 1296/3350MB (38.69%)

                Installation time  : 0 hrs 28 min 0 sec

                Visit: https://123.123.123.123:8090
                Panel username: admin
                Panel password: C73zNU6PoCXLeeWk

             Run cyberpanel help to get FAQ info
             Run cyberpanel upgrade to upgrade it to latest version.
             Run cyberpanel utility to access some handy tools .

              Website : https://www.cyberpanel.net
              Forums  : https://forums.cyberpanel.net
              Wikipage: https://cyberpanel.net/KnowledgeBase/
              Docs    : https://cyberpanel.net/docs/

            Enjoy your accelerated Internet by
                CyberPanel & OpenLiteSpeed
###################################################################
If your provider has a network-level firewall
Please make sure you have opened following port for both in/out:
TCP: 8090 for CyberPanel
TCP: 80, TCP: 443 and UDP: 443 for webserver
TCP: 21 and TCP: 40110-40210 for FTP
TCP: 25, TCP: 587, TCP: 465, TCP: 110, TCP: 143 and TCP: 993 for mail service
TCP: 53 and UDP: 53 for DNS service
Your provider seems blocked port 25 , E-mail sending may not work properly.
Would you like to restart your server now? [y/N]:
Conclusion
That’s it all! You have followed this article, and you have successfully installed CyberPanel on Ubuntu 26.04 with OpenLiteSpeed and Redis Object Cache. If you still cannot do this installation yourself, look for a reputable Managed Service Provider to take care of the server installation for you.
If you liked this post on how to install CyberPanel on Ubuntu 26.04, please share it with your friends or leave a comment below.