phpPgAdmin is a web-based administration tool for PostgreSQL (one of the most popular open-source database management systems). It is written in PHP and it is based on the popular phpMyAdmin interface originally written for MySQL administration. In this tutorial, we will show you how to install phpPgAdmin on CentOS 7. The installation is quick and easy and if you follow the instructions carefully, you will have phpPgAdmin installed on your CentOS 7 VPS in less than 10 minutes. Let’s get started!
1. Connect to your server
Connect to your server via SSH as user root, use the following command:
ssh root@IP_ADDRESS -p PORT_NUMBER
and replace “IP_ADDRESS” and “PORT_NUMBER” with your actual server IP address and SSH port number.
Once logged in, make sure that your server is up-to-date by running the following command:
yum update
2. Install PostgreSQL
At the moment, the included version of PostgreSQL for CentOS 7 is PostgreSQL 9.2
To install a different, more up to date version, you will have to use the PostgreSQL Yum Repository. In this tutorial, we will install PostgreSQL 9.6
First, install the repository RPM. For version 9.6 you would need to run the following:
yum install https://download.postgresql.org/pub/repos/yum/9.6/redhat/rhel-7-x86_64/pgdg-centos96-9.6-3.noarch.rpm
Next, install the client and server packages with:
yum install postgresql96 postgresql96-server
After the installation is complete, run the following command to initialize the database:
/usr/pgsql-9.6/bin/postgresql96-setup initdb
To enable the PostgreSQL service to automatically start after a server reboot, execute the following:
systemctl enable postgresql-9.6
To start PostgreSQL on your server, type:
systemctl start postgresql-9.6
You can check the status of your PostgreSQL service with:
systemctl status postgresql-9.6
If the service is active, you should get the following output on your screen:
● postgresql-9.6.service - PostgreSQL 9.6 database server
Loaded: loaded (/usr/lib/systemd/system/postgresql-9.6.service; disabled; vendor preset: disabled)
Active: active (running) since Mon 2018-12-10 09:55:34 CST; 1s ago
Docs: https://www.postgresql.org/docs/9.6/static/
Process: 936 ExecStartPre=/usr/pgsql-9.6/bin/postgresql96-check-db-dir ${PGDATA} (code=exited, status=0/SUCCESS)
Main PID: 943 (postmaster)
CGroup: /system.slice/postgresql-9.6.service
├─943 /usr/pgsql-9.6/bin/postmaster -D /var/lib/pgsql/9.6/data/
├─944 postgres: logger process
├─946 postgres: checkpointer process
├─947 postgres: writer process
├─948 postgres: wal writer process
├─949 postgres: autovacuum launcher process
└─950 postgres: stats collector process
3. Change the postgres system account password
Once the installation is completed, log into the postgres system account so you can access PostgreSQL:
su - postgres
You can now access PostgreSQL using:
psql
Change your postgres with the following command:
\password postgres
Enter the new password when prompted.
Quit the psql command line with:
\q
To exit, type:
exit
4. Configure Apache
In order to access phpPgAdmin in your browser, you will need to modify the phpPgAdmin Apache virtual host configuration file. To do this run the following command:
nano /etc/httpd/conf.d/phpPgAdmin.conf
Comment out the ‘Require local‘ line by adding ”#‘ at the front. Under the same line, add Require all granted. This is how the configuration file should look like:
#
# This configuration file maps the phpPgAdmin directory into the URL space.
# By default this application is only accessible from the local host.
#

Alias /phpPgAdmin /usr/share/phpPgAdmin

<Location /phpPgAdmin>
<IfModule mod_authz_core.c>
# Apache 2.4
#Require local
Require all granted
#Require host example.com
</IfModule>
<IfModule !mod_authz_core.c>
# Apache 2.2
Order deny,allow
Deny from all
Allow from 127.0.0.1
Allow from ::1
# Allow from .example.com
</IfModule>
</Location>
Restart your Apache web server with:
systemctl restart httpd
5. Install and configure phpPgAdmin
To install phpPgAdmin on your server run the following command:
yum install phpPgAdmin
You will also need to install the PostgreSQL database module for PHP with:
yum install php-pgsql
After the installation is completed we need to make a few changes in the phpPgAdmin configuration file:
nano /etc/phppgadmin/config.inc.php
Add localhost for the following parameter:
$conf['servers'][0]['host'] = 'localhost';
To be able to login phpPgAdmin as the postgres user, change the following parameter to ‘false’:
$conf['extra_login_security'] = false;
To hide other databases which are not owned by the user, set the following parameter to ‘true’:
$conf['owned_only'] = true;
We will also need to configure our PostgreSQL server to support md5 authentication:
nano /var/lib/pgsql/9.6/data/pg_hba.conf
Change the following lines from:
host all all 127.0.0.1/32 ident
host all all ::1/128 ident
to:
host all all 127.0.0.1/32 md5
host all all ::1/128 md5
Restart the PostgreSQL service with:
systemctl restart postgresql-9.6
6. Conclusion
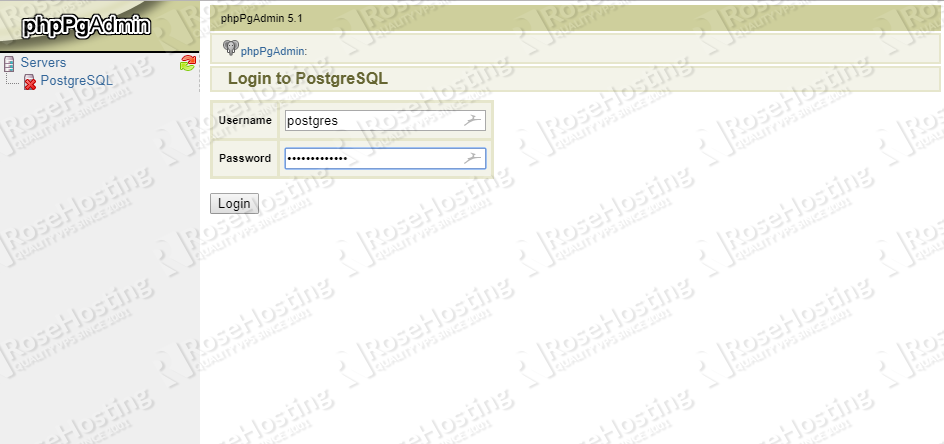
That’s it! If you carefully followed all the instructions you have now successfully installed phpPgAdmin on your CentOS 7 VPS.
You can now access phpPgAdmin in your browser and log in with your postgres user at http://your-ip-address/phpPgAdmin
Tutorial does not work, it fails on this:
yum install https://download.postgresql.org/pub/repos/yum/9.6/redhat/rhel-7-x86_64/pgdg-centos96-9.6-3.noarch.rpm
rpm not found
You can use this: yum install https://download.postgresql.org/pub/repos/yum/reporpms/EL-7-x86_64/pgdg-redhat-repo-latest.noarch.rpm