This tutorial explains how to install CloudPanel on a Debian 12. Managing servers becomes much easier when using a control panel, especially intuitive solutions like CloudPanel. It is considered one of the top free hosting control panels, offering a wide range of features. The installation is done using a single script and requires a clean server environment. It is widely used by hosting providers, and administrators can easily deploy various types of software for clients, including static websites, Python, PHP, and NodeJS applications, reverse proxies, SSL certificates, and more, which will be covered in the following sections. In this blog post, we will go through the installation of CloudPanel, how to access it, and explore the features it offers
Installing CloudPanel on Debian 12 is straightforward and usually takes around 10 minutes. Let’s get started!
Prerequisites
- A server running Debian 12 OS
- User privileges: root or non-root user with sudo privileges
- A valid domain with a pointed A record to the server IP address
Update the System
Before starting the CloudPanel installation, we assume you have a freshly installed operating system. Therefore, the first step is to update all system packages to their latest versions. To do this, run the following command:
apt update -y && apt upgrade -y
Stop And Remove Unnecessary Services
For a successful CloudPanel installation, the server needs to be in a clean environment. In this tutorial, we assume you are working with a fresh Debian 12 setup. If that is not the case, you can execute the commands below to stop and remove any existing services that could potentially conflict with the installation.
systemctl stop mysql.service || systemctl stop apache2.service || systemctl stop dovecot.service || systemctl stop postfix.service
Once the services are stopped, we can remove them completely with the following command:
apt purge mysql-server apache2 dovecot-core postfix -y

apt update -y
Install CloudPanel from the Installation Script
After updating the system, the next step is to download the installation script:
curl -sS https://installer.cloudpanel.io/ce/v2/install.sh -o install.sh
Next, make the script executable:
chmod +x install.sh
Then, execute the script using the supported DB engine for Debian 12. In this case, we will use MARIADB 10.11:
DB_ENGINE=MARIADB_10.11 bash install.sh
The installation process will begin, so please allow some time for it to complete.
Once the installation is finished, you will receive output similar to the following:
    .
    .
    .
Processing triggers for php8.5-cli (8.5.4-1+clp-bookworm) ...
Processing triggers for php8.5-fpm (8.5.4-1+clp-bookworm) ...
Processing triggers for php8.0-fpm (8.0.30-4+clp-bookworm) ...

The installation of CloudPanel is complete!


CloudPanel can be accessed now: <b>https://YourServerIPAddress:8443</b>
Finish the CloudPanel Installation
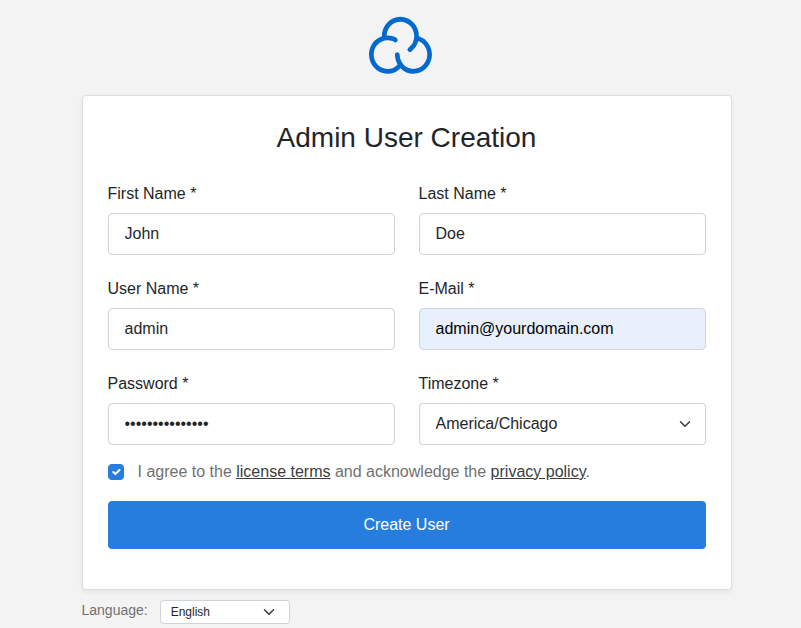
To complete the CloudPanel setup, access the panel via port 8443 using your server IP address: https://YourServerIPAddress:8443
Fill in the administrator details by setting the username, password, email address, and timezone, then click on the “Create User” button:
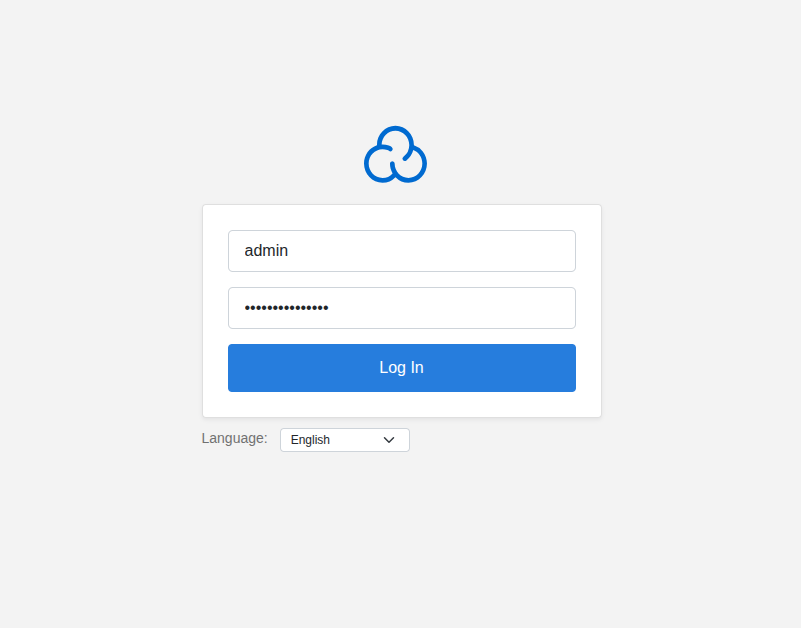
You will then be redirected to the login page. Enter the credentials you created in the previous step and click on the “Log In” button.
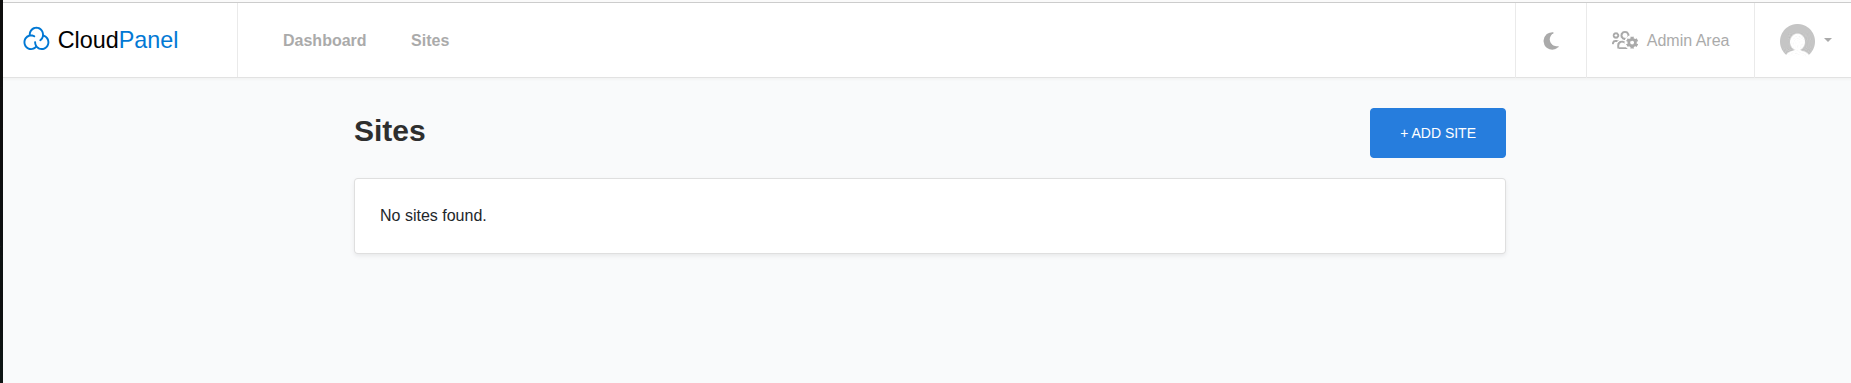
After logging in, you will be redirected to the CloudPanel admin dashboard:
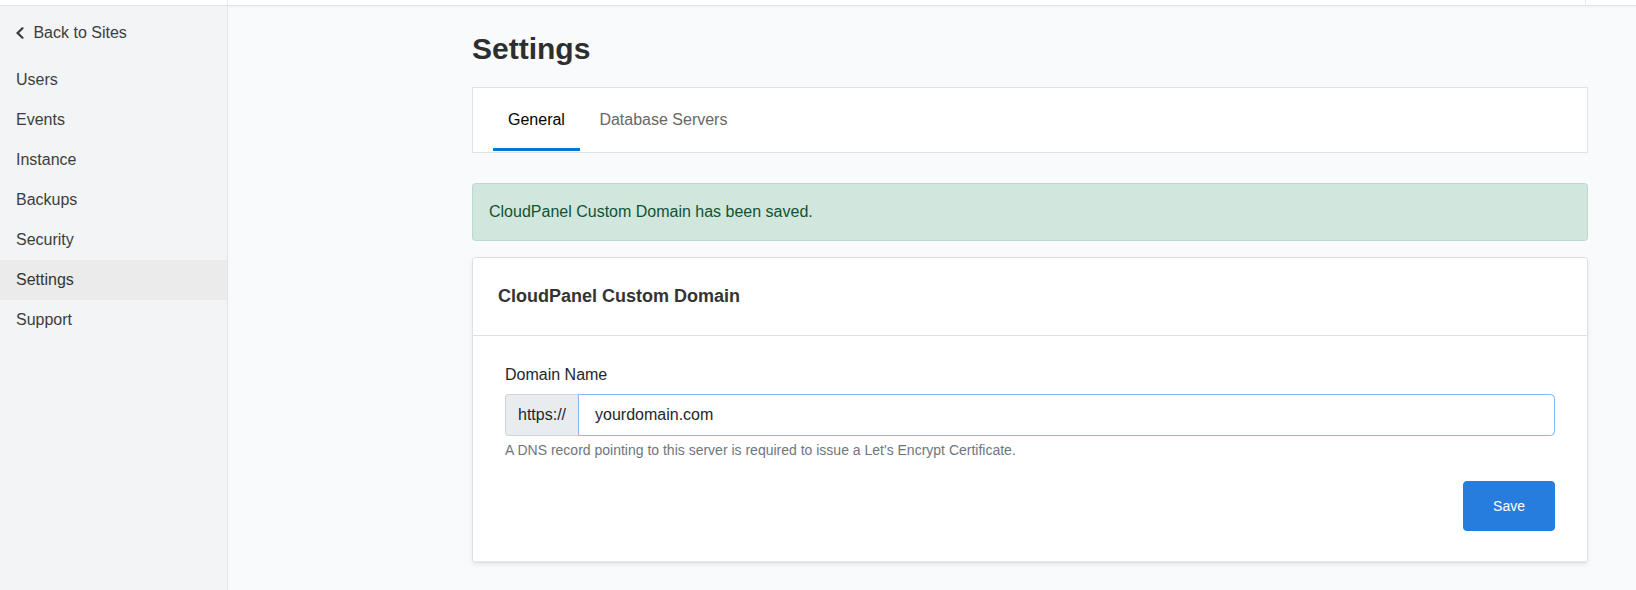
Access CloudPanel via a domain name
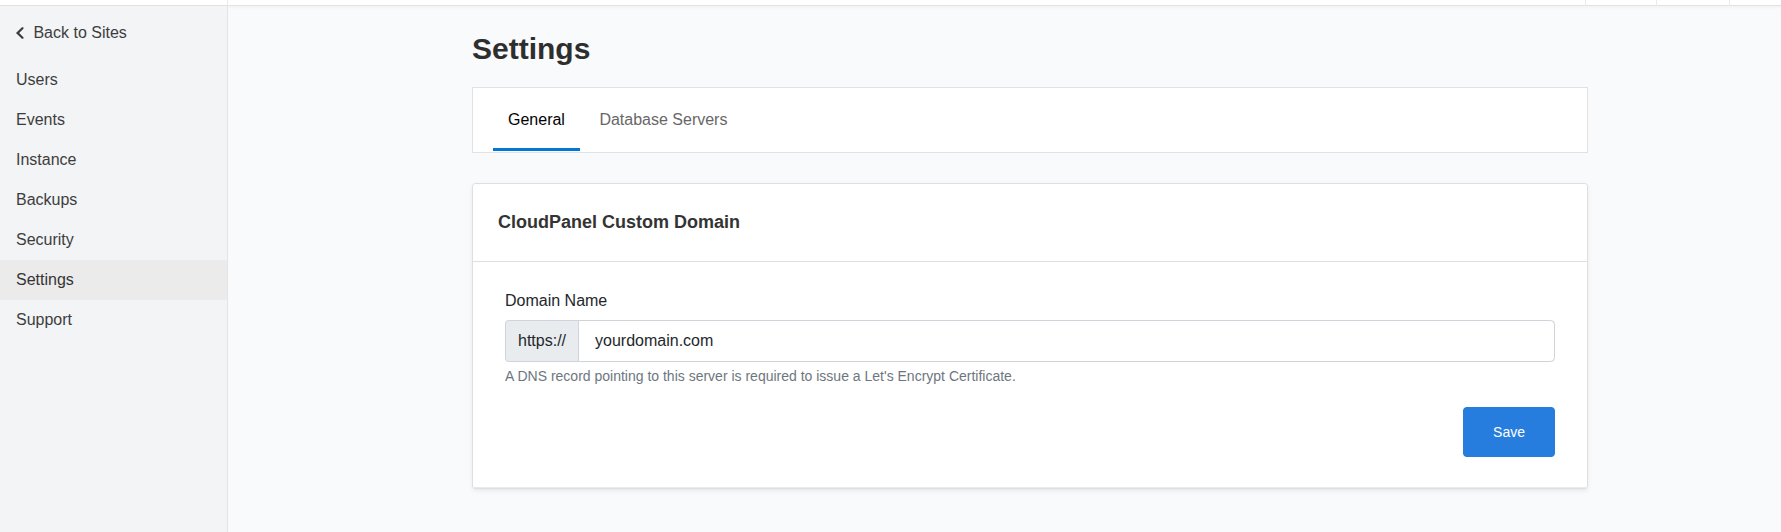
In order to access CloudPanel via a domain name with an SSL certificate, we need to add it following these steps:
On the top right, click on Admin Area, then on the left menu on Settings, and in the Domain Name field, enter your domain:
Once added, click the Save button; the domain will be added, and Free Let’s Encrypt will be installed. Once done, you should receive the following message:
How to Secure the CloudPanel?
Securing CloudPanel is a crucial part of the setup process. Click the top-right “Admin Area,” then in the Security section, navigate to Security to enable two-factor authentication (2FA) for users. Additionally, you can restrict access by allowing only specific IP addresses to connect to your server. An unsecured CloudPanel installation may allow malicious files to be uploaded, posing a risk to all system users.
How to Add a Domain Name?
Adding a domain name in CloudPanel is a simple process. From the main dashboard, click the Sites section, then select Add Site. Choose the type of website—for example, a PHP site. Then enter a valid domain that points to your server’s IP address, select the PHP version, and set a password for the site user. The application option can remain set to the default value.
Restart Services
You can restart the services by clicking on the restart button next to each service in the Instance field on the left menu:

Conclusion
CloudPanel is a free and open-source control panel that requires root access and cannot be installed on shared hosting. Migrating an existing website to CloudPanel must be done manually by importing databases and configuring virtual hosts. It provides many useful features, including database management, cron jobs, backups, service management, security configuration, and more.
Here’s a list of features offered by CloudPanel:
Dashboard with system resource monitoring (CPU, RAM, disk usage, load)

Management of users and roles

Support for multiple PHP versions

Site and domain management tools

Database management (MySQL / MariaDB)

Integration with cloud services (automated backups, provider API keys)

Firewall configuration and security controls

Access via SSH and FTP

Domain and DNS configuration

SSL/TLS certificates via Let’s Encrypt

Task scheduling with cron jobs

Virtual host configuration editor

File management interface

Access logs and log viewer

Custom panel domain configuration

Command-line and automation utilities

Blocking of IP addresses and bots

Basic authentication for domains

External database server compatibility

Event tracking and audit logs

Compatibility with major cloud platforms

Multi-language support and localization options
That’s it all! You have successfully installed CloudPanel on Debian 12.
If you liked this post on how to install CloudPanel on Debian 12, please share it with your friends or leave a comment below.