
Introduction
Matomo or formerly known as Piwik, is free and open source, PHP based, web analytics software platform similar to Google Analytics, used by more than 300,000 websites around the world. It provides users with detailed reports of their websites, search engines and keywords used by the visitors, their language and geographical location, pages they visit, files they download, etc.. In this tutorial we will guide you through the installation of Matomo on an Ubuntu 16.04. The installation is pretty simple and straightforward and it should take no longer than 10 minutes.
Matomo comes with tons of useful features, some of them are listed above:
– Real time data updates
– Customizable Dashboard
– Row Evolution
– Analytics for Ecommerce
– Content Tracking
– Site Search Analytics
– Visitors Geolocation
– Site speed & pages speed reports
– Track traffic from search engines
and many more…
Prerequisites
In order to run Matomo on your Ubuntu 16.04 VPS you should have the following requirements installed
– Webserver such as Apache, Nginx, IIS, etc.
– PHP version 5.5.9 or newer with pdo and pdo_mysql, or the mysqli extension.
– MySQL/MariaDB version 5.5 or newer
This tutorial explains the installation and configuration of all listed dependencies.
Update the system
Before you start installing Matomo, you should update the services installed on the VPS to the latest version. Login to the server via SSH as use root
ssh root@IP_Address -p Port_Number
and run the following command:
apt update && apt upgrade
Install Apache web server
Use the following commands to install the Apache web server on your Ubuntu 16.04 VPS
apt install apache2
Once the installation of the webs server is completed, you should enable it to start automatically upon system boot
systemctl enable apache2
Install PHP 7
Matomo is a PHP based application so we need to install PHP on the server in order to run it. It is recommended to use PHP 7 because it is more memory efficient than the previous PHP versions. We can install PHP 7 and some PHP extensions required by Matomo with the following command
apt install php7.0 php7.0-curl php7.0-gd php7.0-cli mysql-server php7.0-mysql php-xml php7.0-mbstring
Install MariaDB server and create a database
Matomo needs access to a database to store the web analytics data, so we will install MariaDB server. Run the following command:
apt install -y mariadb-server
and enable it to start upon server reboot
systemctl enable mysql
once the installation is competed run the ‘mysql_secure_installation’ post installation script to secure the MariaDB server and set a root password.
You can configure it as follows:
Enter current password for root (enter for none): Enter
Set root password? [Y/n]: Y
New password:
Re-enter new password:
Remove anonymous users? [Y/n]: Y
Disallow root login remotely? [Y/n]: Y
Remove test database and access to it? [Y/n]: Y
Reload privilege tables now? [Y/n]: Y
Now, the MariaDB server is ready for creating a new user and database for the Matomo installation. Login to the MariaDB server as user root and create them:
mysql -u root -p

MariaDB [(none)]> CREATE DATABASE matomo;
MariaDB [(none)]> GRANT ALL PRIVILEGES ON matomo.* TO 'matomo'@'localhost' IDENTIFIED BY 'PASSWORD';
MariaDB [(none)]> FLUSH PRIVILEGES;
MariaDB [(none)]> \q
Don’t forget to replace PASSWORD with an actual, strong password.
Download and install Matomo
Go to Matomo’s official and download the latest stable release of the application
wget https://builds.piwik.org/piwik.zip
Extract the downlaoded zip archive to the document root directory on your server
unzip piwik.zip -d /var/www/html/
This will create a new ‘piwik’ directory in the directory where you extracted the archive. Set the web server user to be owner of all files and directory inside this newly created directory
chown -R www-data:www-data piwik
Complete the installation
If you closely followed the steps in this tutorial, at this point Matomo should be successfully installed on your Ubuntu 16.04 VPS and accessible at http://Your_IP/piwik . Point your favorite web browser to this URL and you will get Matomo’s welcome screen
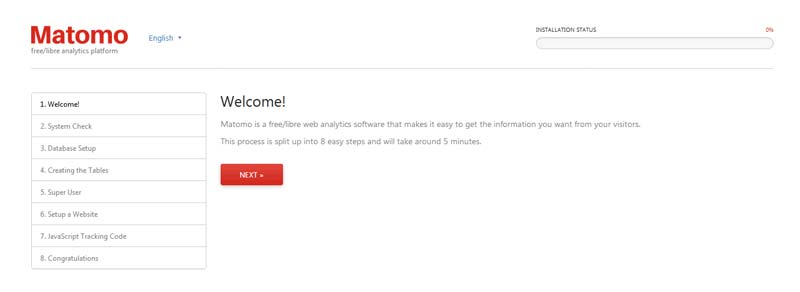
The installation wizard will check if your server meets all requirements. Once you confirm that everything is OK, proceed to the next step and enter the necessary information for the MariaDB user and database we created earlier in this post. On the next screens you will be prompted to create a user user for managing Matomo, setup the first website you would like to track and add the JavaScript Tracking Code to the websites you your website in order to be able to track the traffic.
That’s all. With the step the installation of Matomo is completed and you can start using this great application. If you need more information about Matomo, please check their official documentation.
Of course, you don’t need to install Matomo on your Ubuntu 16.04 server yourself if you have a Ubuntu VPS hosted with us – in which case, our technical support team will install Matomo and set it up for you. They are available 24/7, and can cater to any questions or requests.
PS. If you liked this post, feel free to share it with your friends by using the social media share shortcuts below, or simply leave a comment. Thanks.